Like the pages of our worksheet or books Photoshop LAYERS are too similar. When one page of the book is filled we jump to next page similarly we go creating new layers in Photoshop . Here the layers have the property of see through transparent part of layers below it. Layers can contain different types of pictures, texts, objects, shapes, media and many other things.
CREATING A NEW LAYER
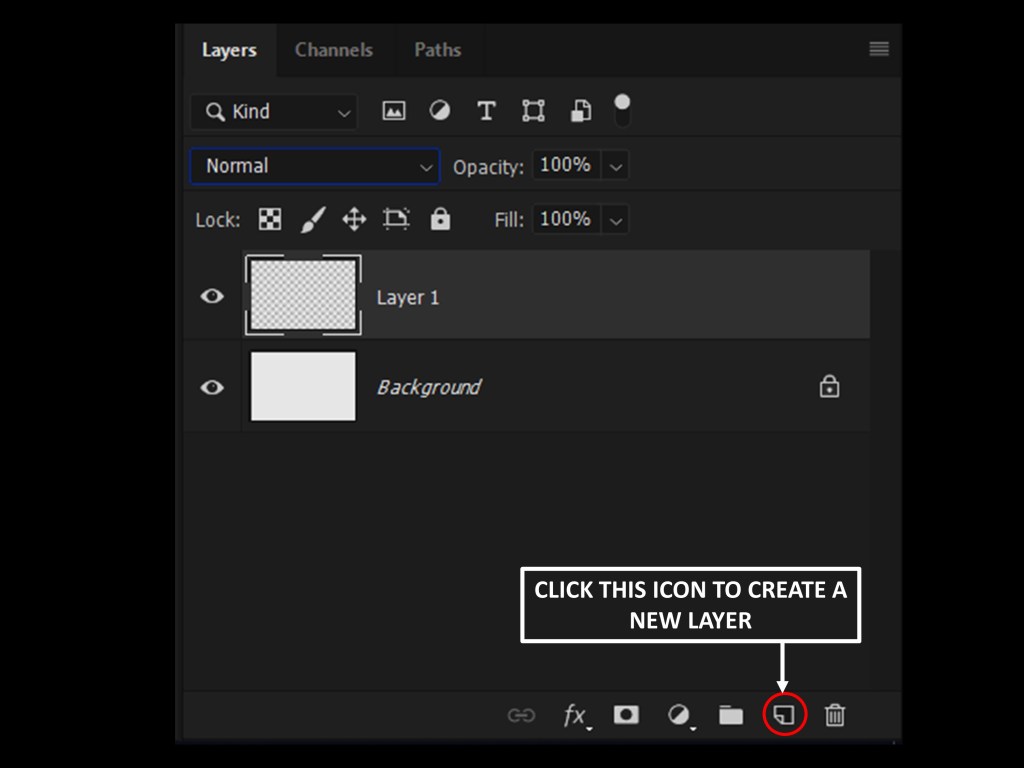
We can create a new layer by clicking on Create a New Layer icon at the bottom of the layer panel.
We can do also by pressing CTRL + SHIFT + N or go to LAYER > NEW > Layer to create it.
BLEND MODES OF THE LAYER
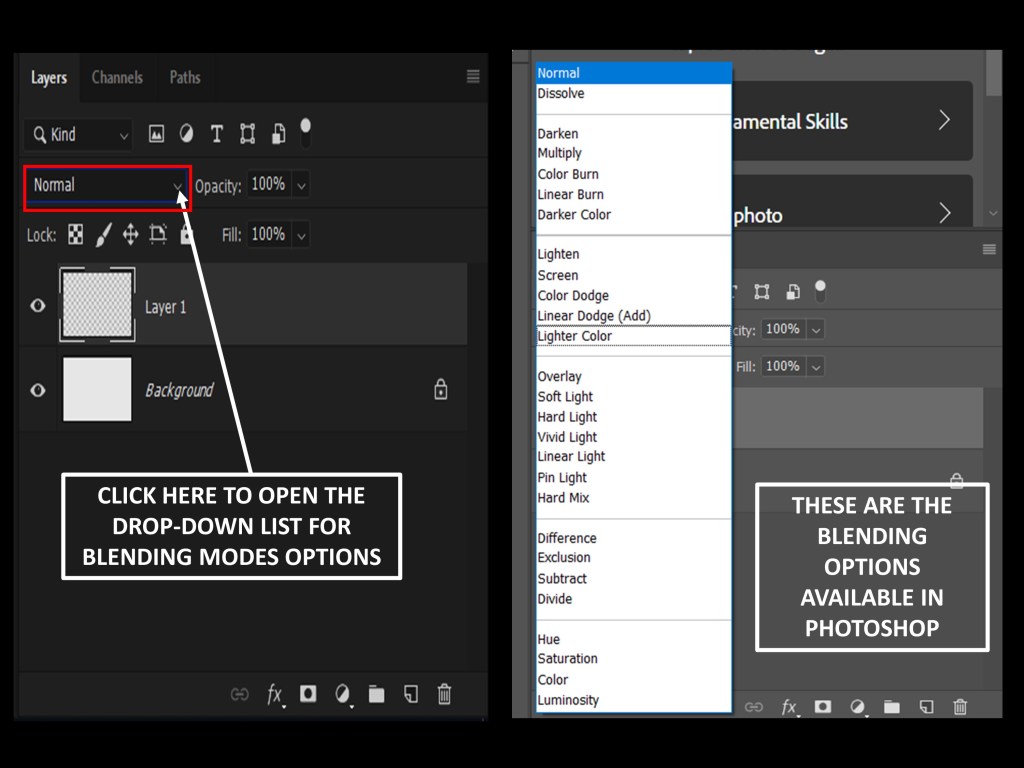
We can set the required blending modes of a layer from the drop down list as shown in the above figure. We will be discussing all these blending modes later in this series in BLENDING MODES & INSTAGRAM LIKE FILTERS .
OPACITY OF A LAYER
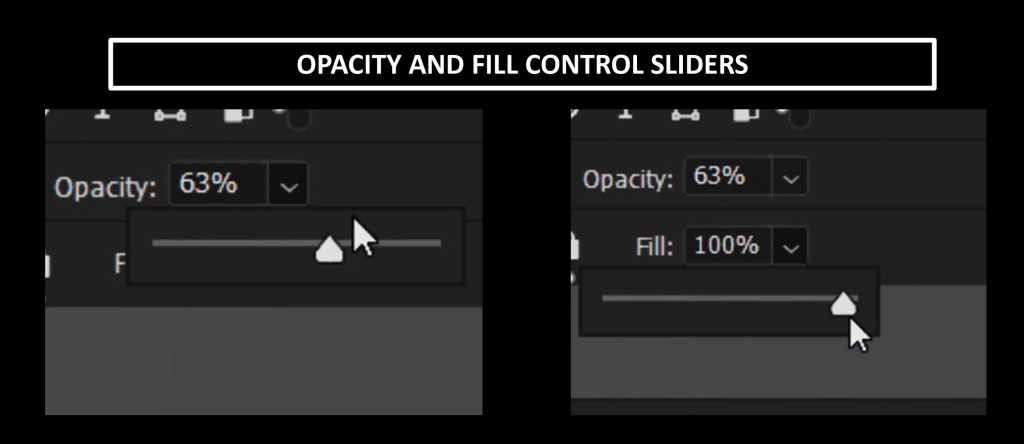
To control the transparency of a layer we have layer opacity feature. By adjusting the slider we can decrease or increase the layer opacity. Similarly the Fill percentage can be adjusted which is just below to opacity .
LAYER VISIBILITY
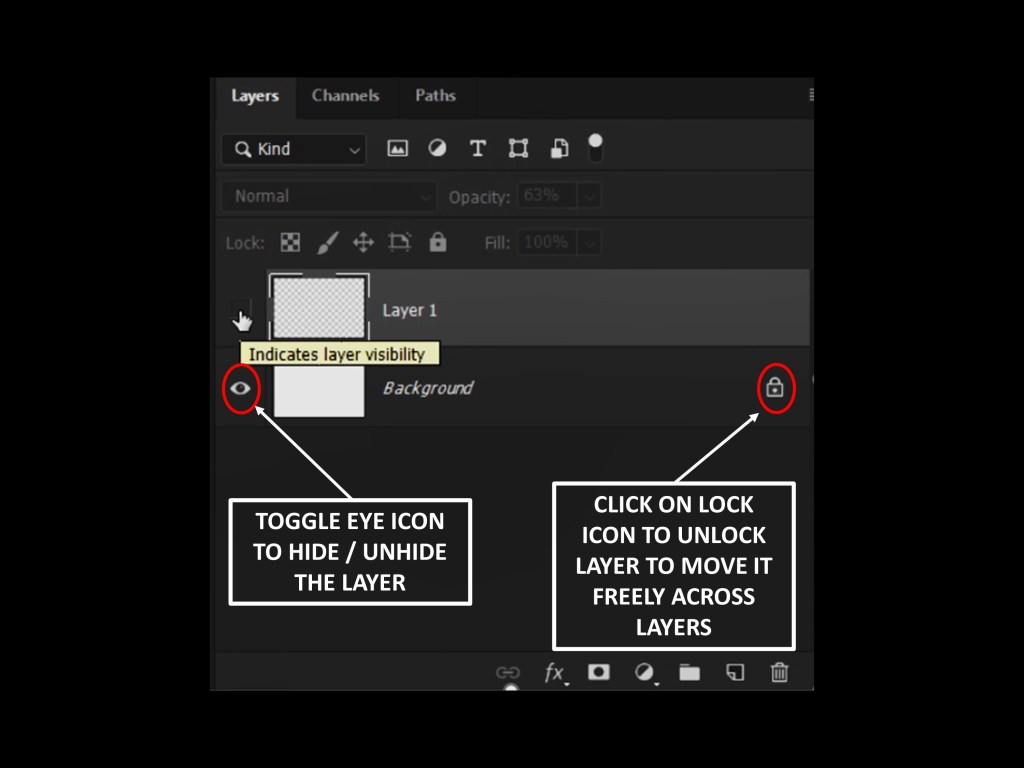
To hide the visibility of layer we can click on the eye button left to the layer to hide the particular layer . Clicking again will unhide the layer.
Useful tips:
- To unlock a background layer we can double click on the layer or click the “lock” sign to the right on the layer .
- To add an image into layer go to FILE > PLACE EMBEDDED .
GROUPING LAYERS
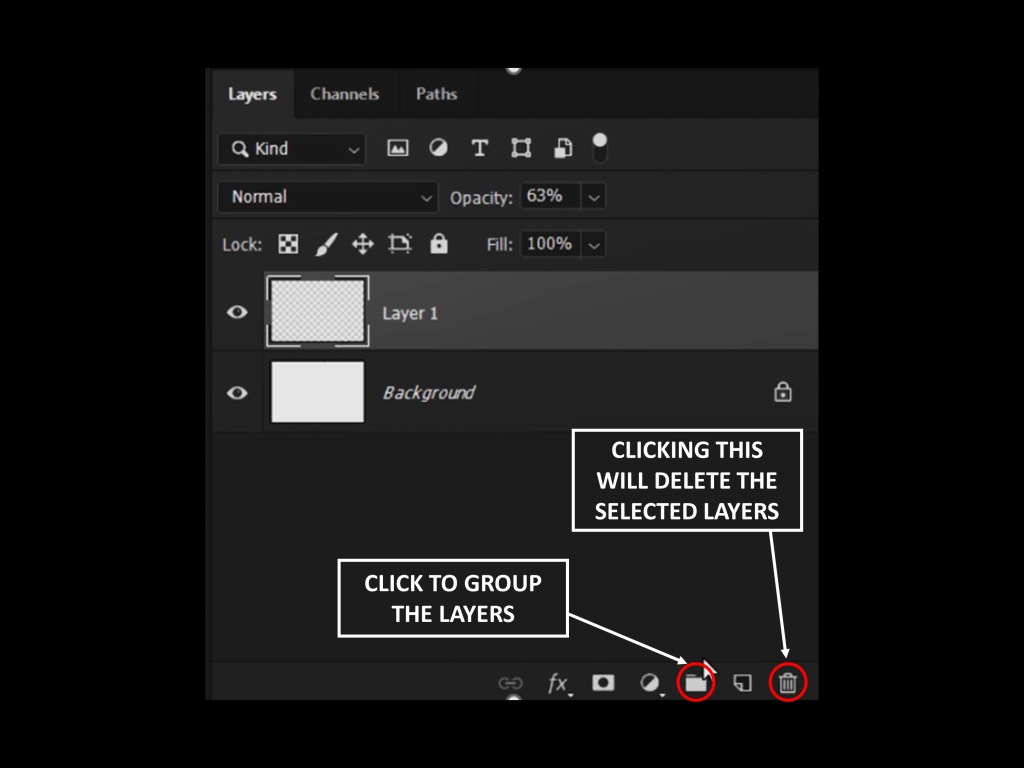
To group the particular layers into a category and layers as its sub category. We can select the required by pressing the CTRL key and Press CTRL+G to group the layers or we have a icon below at the layer panel Create a new Group.
LETS CREATE WHAT WE LEARNT ABOVE…
- Activate the Rectangular Marquee tool by pressing (M) on keyboard.
- Now create a rectangle by simply dragging it over the document
- Fill it with any color you want by pressing (Alt + Backspace for foreground color and CTRL + Backspace for background color) on the keyboard.
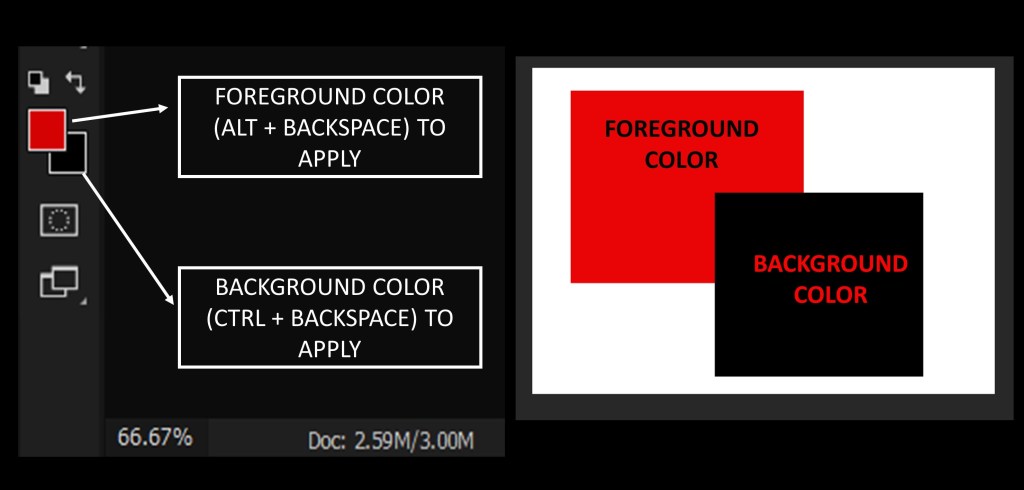
You can also change the foreground and background by clicking on the color icons shown in the image. As you click on the foreground color a color picker dialog box appears and you can choose color you want.
Once you created the rectangle, create another one in the same layer but choose a different color for it.
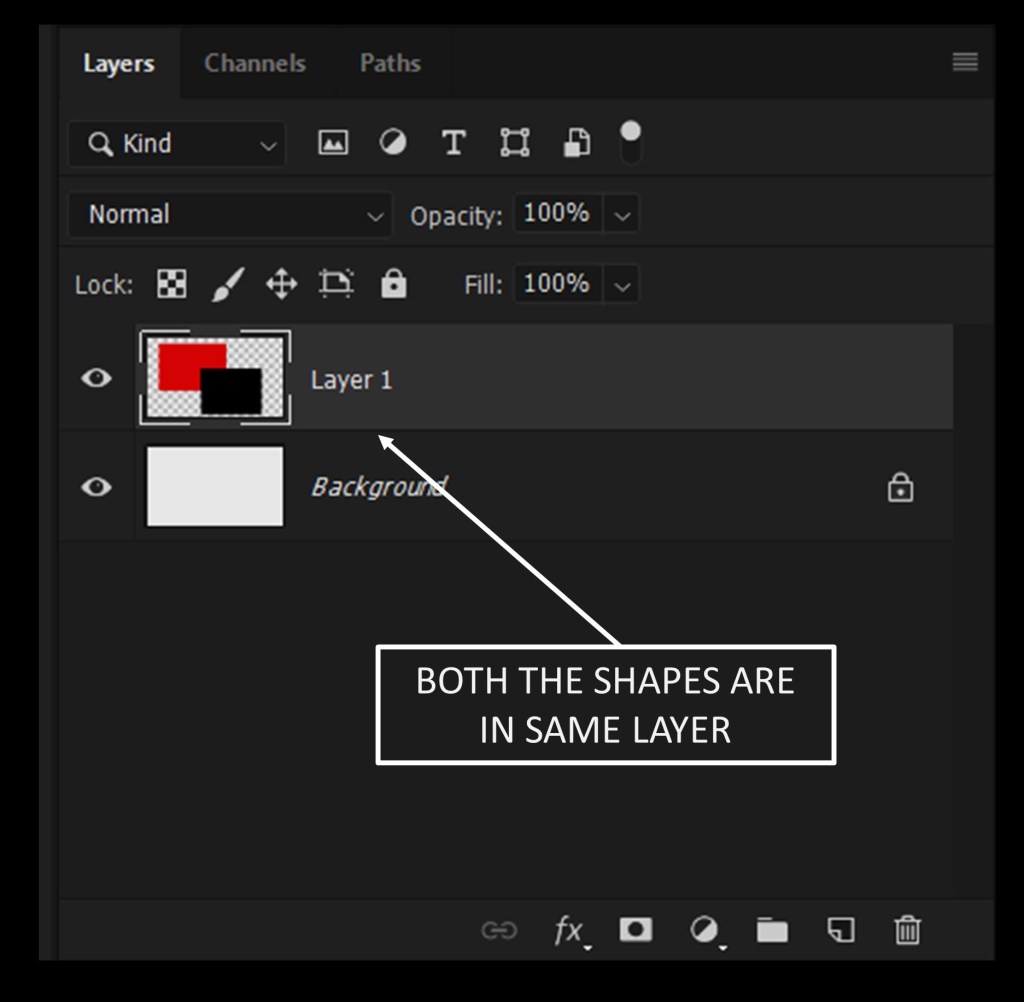
Here we have our layer panel looks where we created both the shapes in a single layer.
Lets create it in two different layers :
- Same steps as above to create a single rectangle in one layer (layer 1)
- Again create a new layer pressing CTRL + SHIFT +N (layer 2)
- Draw a rectangle using Marquee tool (M) of different color .
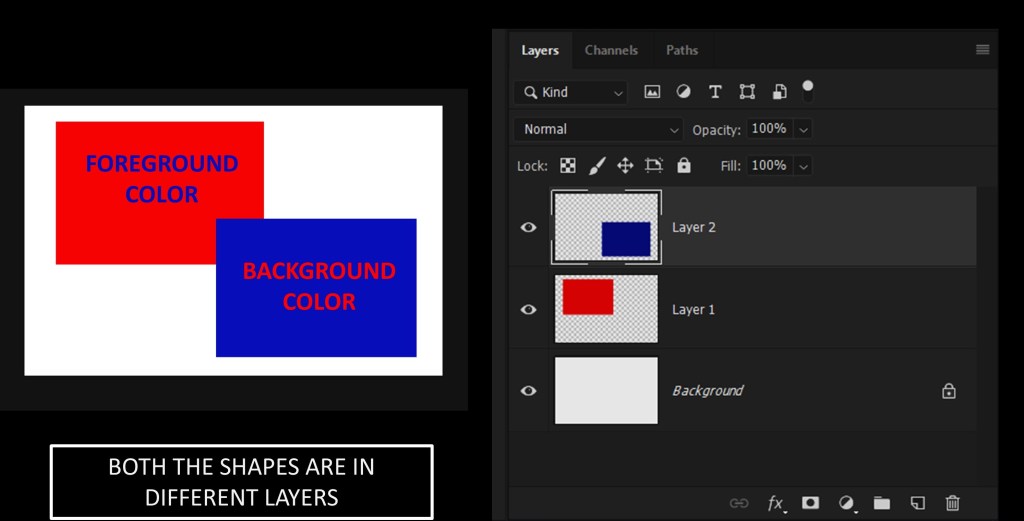
Here we have our layers panel looks where we created both the shapes in a two layer.
NOW LET’s HAVE A ASSIGNMENT OF CREATING CLOUDS IN SKY !!!
STEPS :
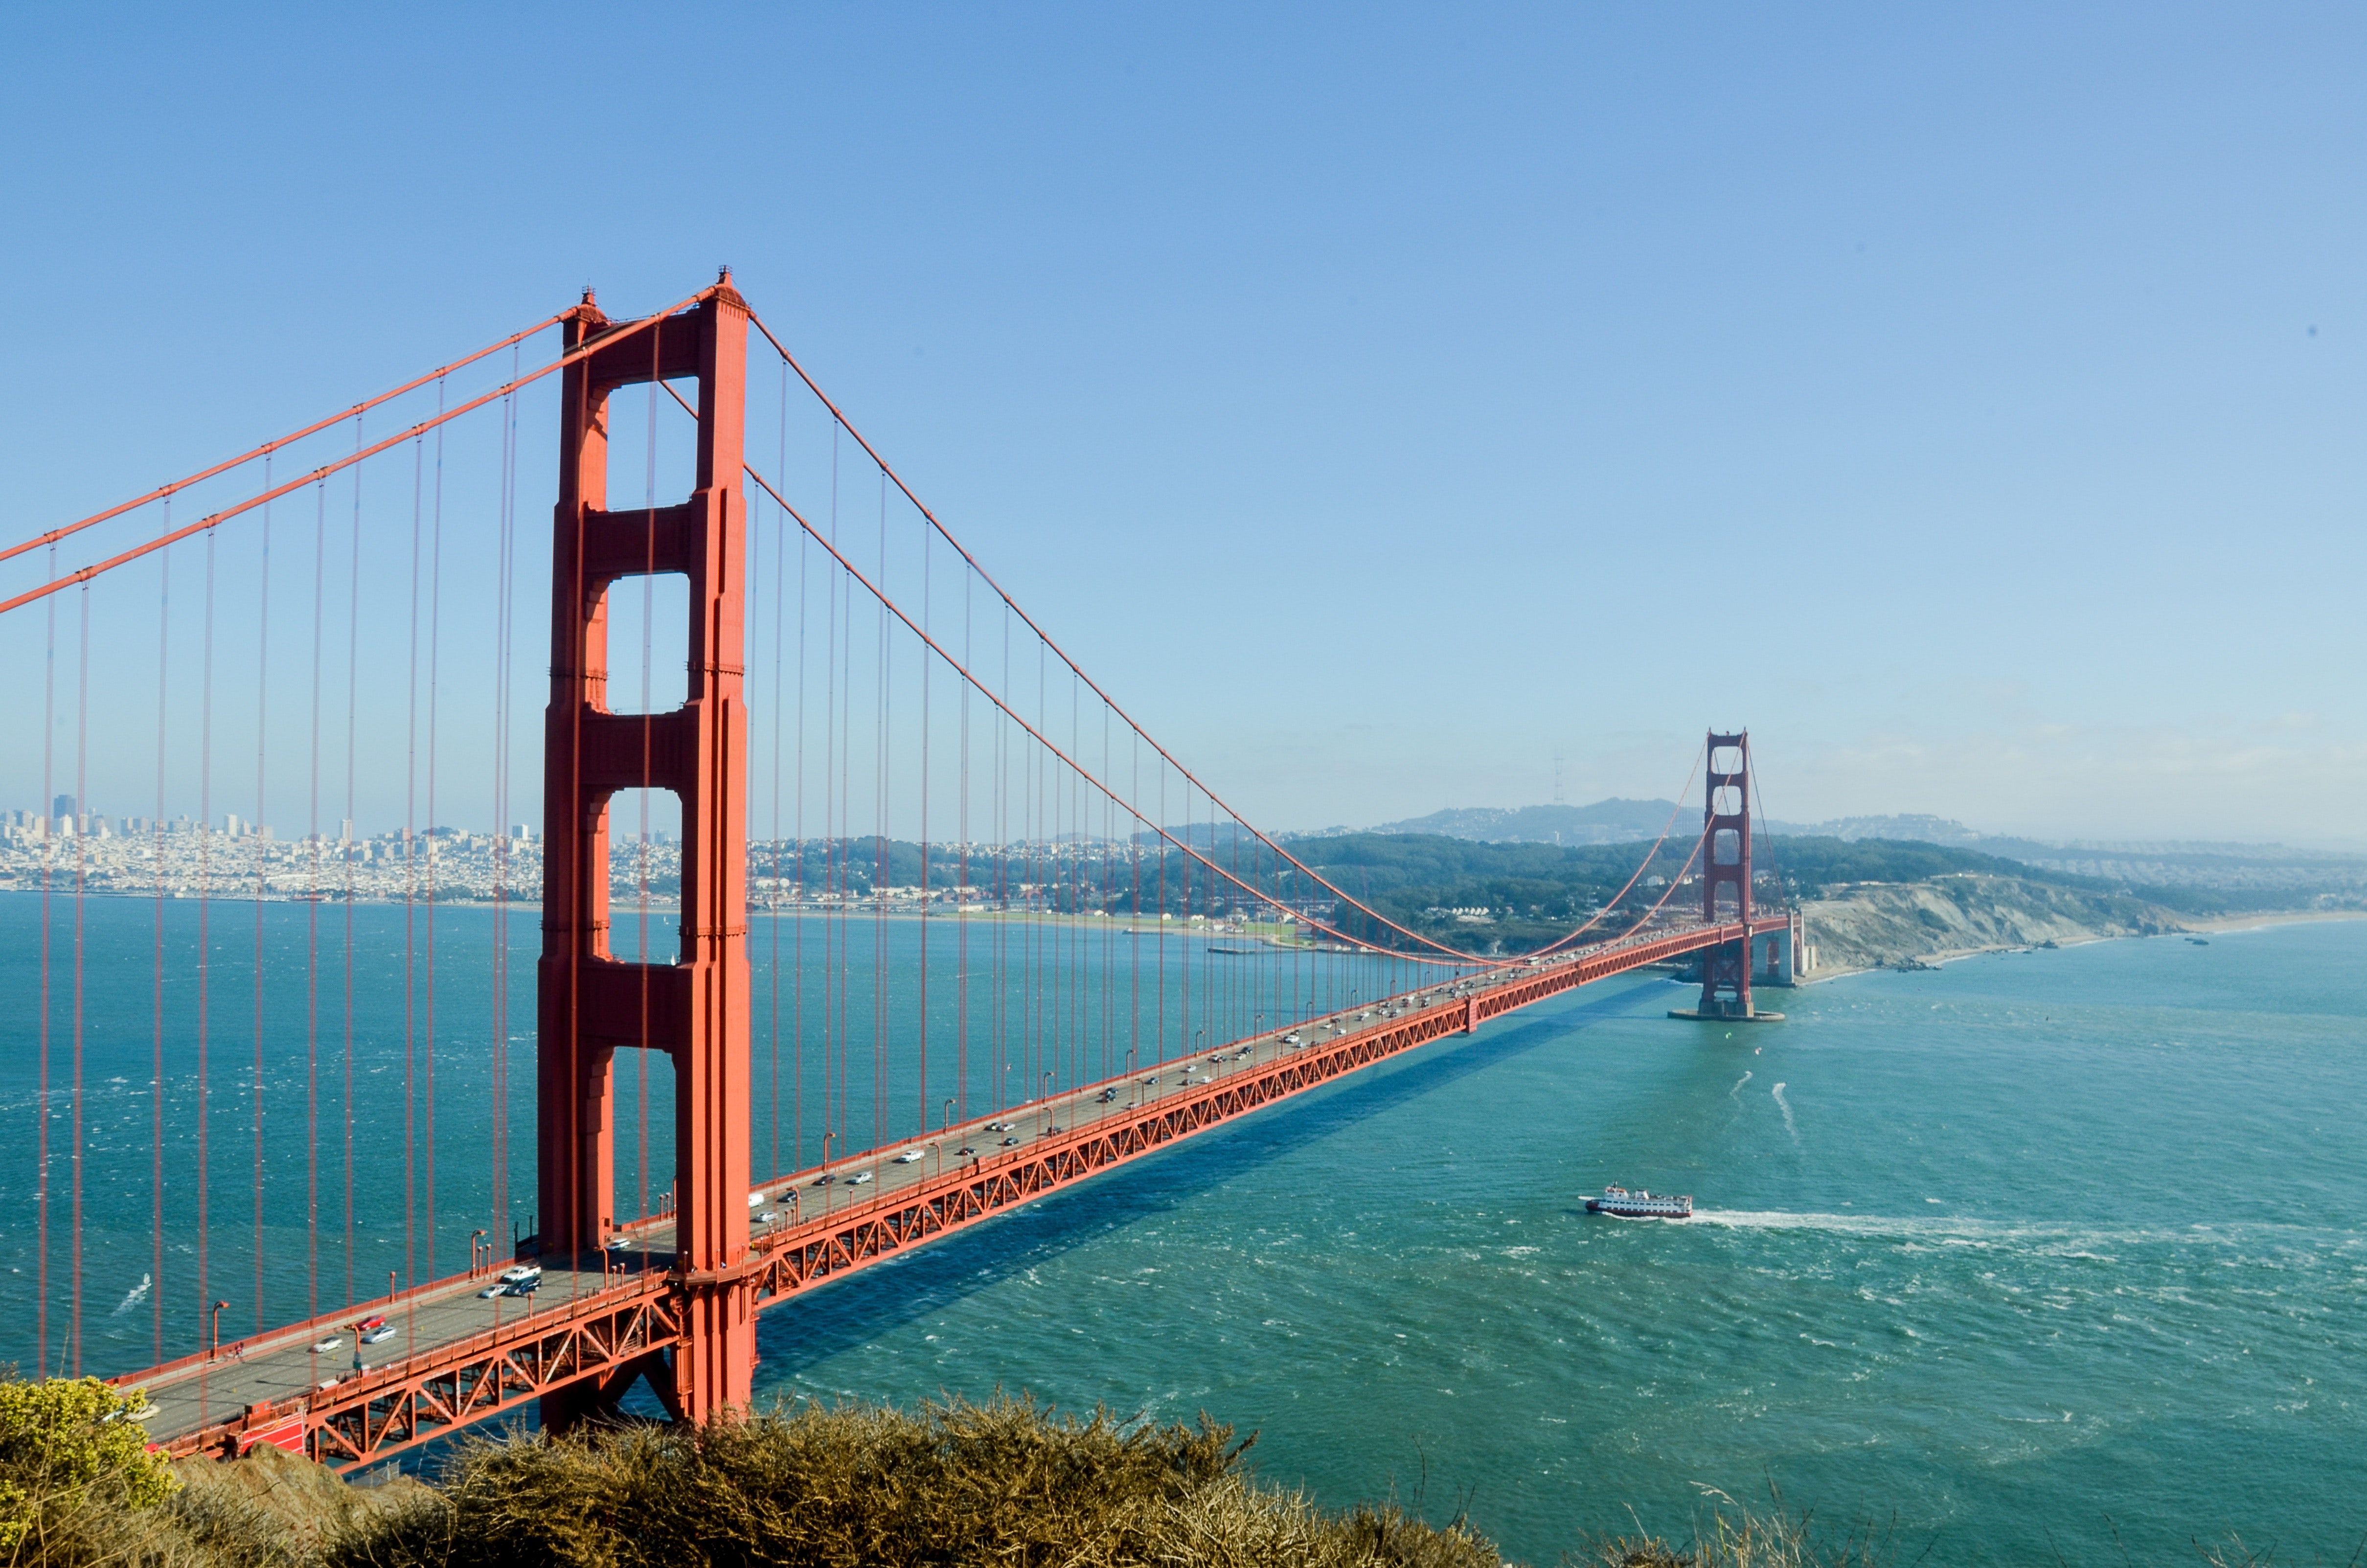
- Open an image by FILE >> OPEN and select the image with clear sky like a bridge or hill station etc.. It will open as background in layer panel. ( Images used here download links are given below)
- Click the lock icon on the layer right of it . It will unlock the background to a movable layer.
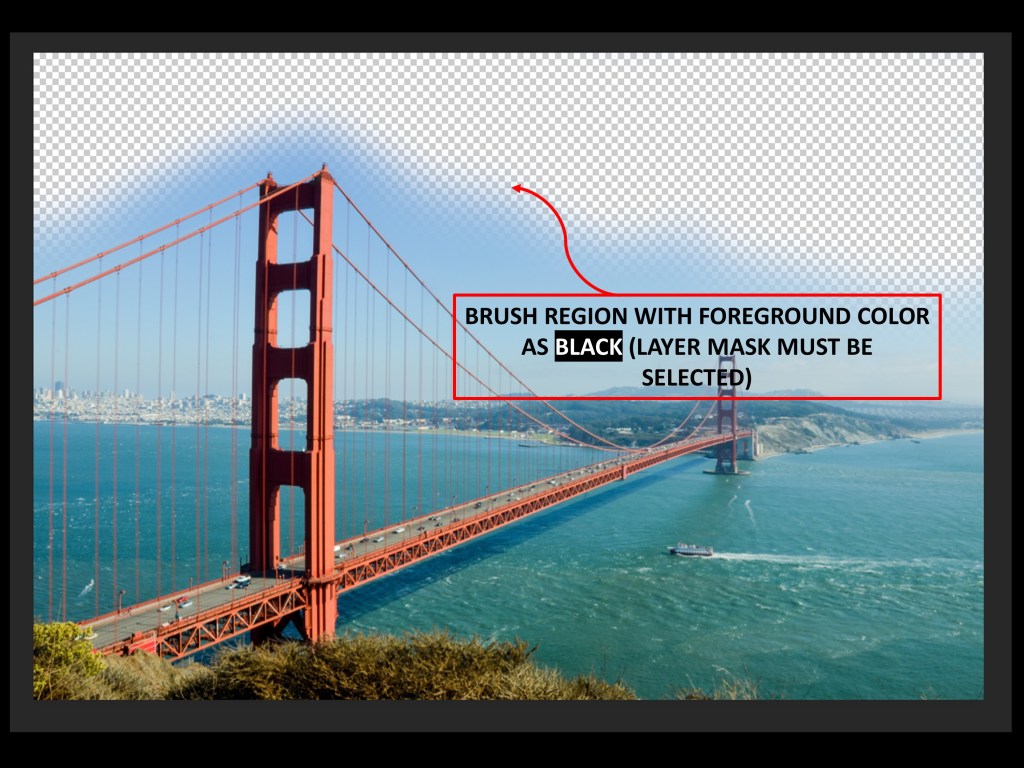
- Create a Layer Mask as shown below in figure clicking at down of layer panel on icon create a layer mask.

Note :
- The masked layer appear of white color which means everything is visible to us our image .
- If we paint with black it will hide the portion painted as black & will show the check-boxed layer.
- Our work is to paint the clear sky part with black as foreground color and white as background color by selecting the layer mask.
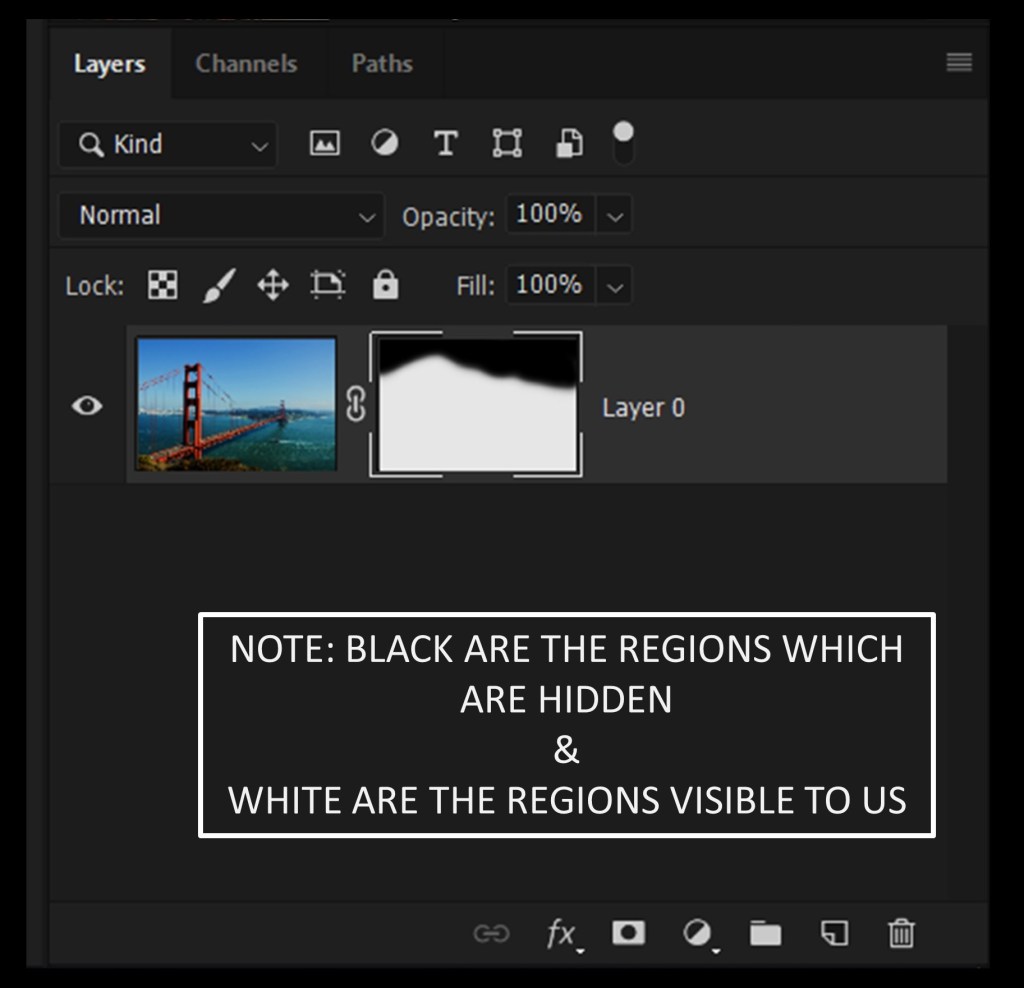
4. Press key “B” from keyboard to activate the brush tool.
5. Adjust the Flow to 90-100 % .

Now our layer panel layer mask must look like this….
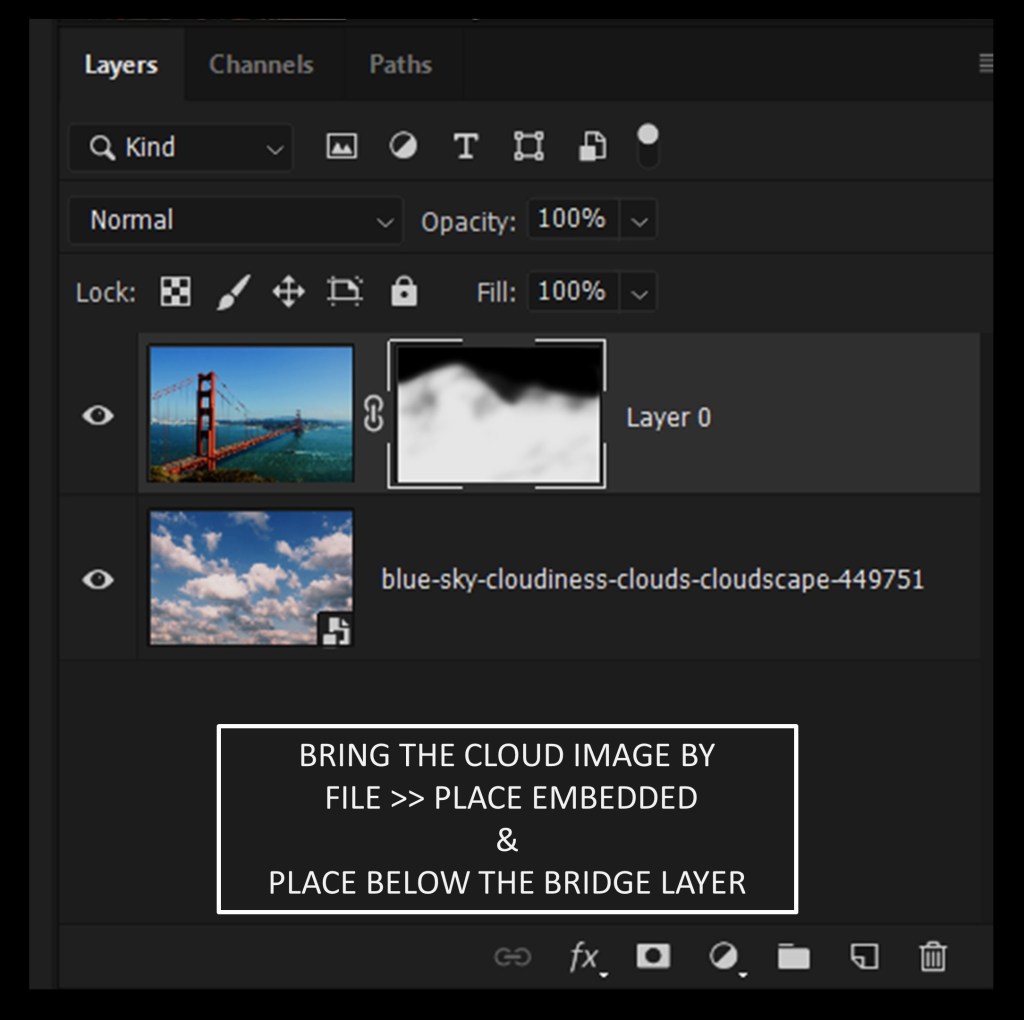
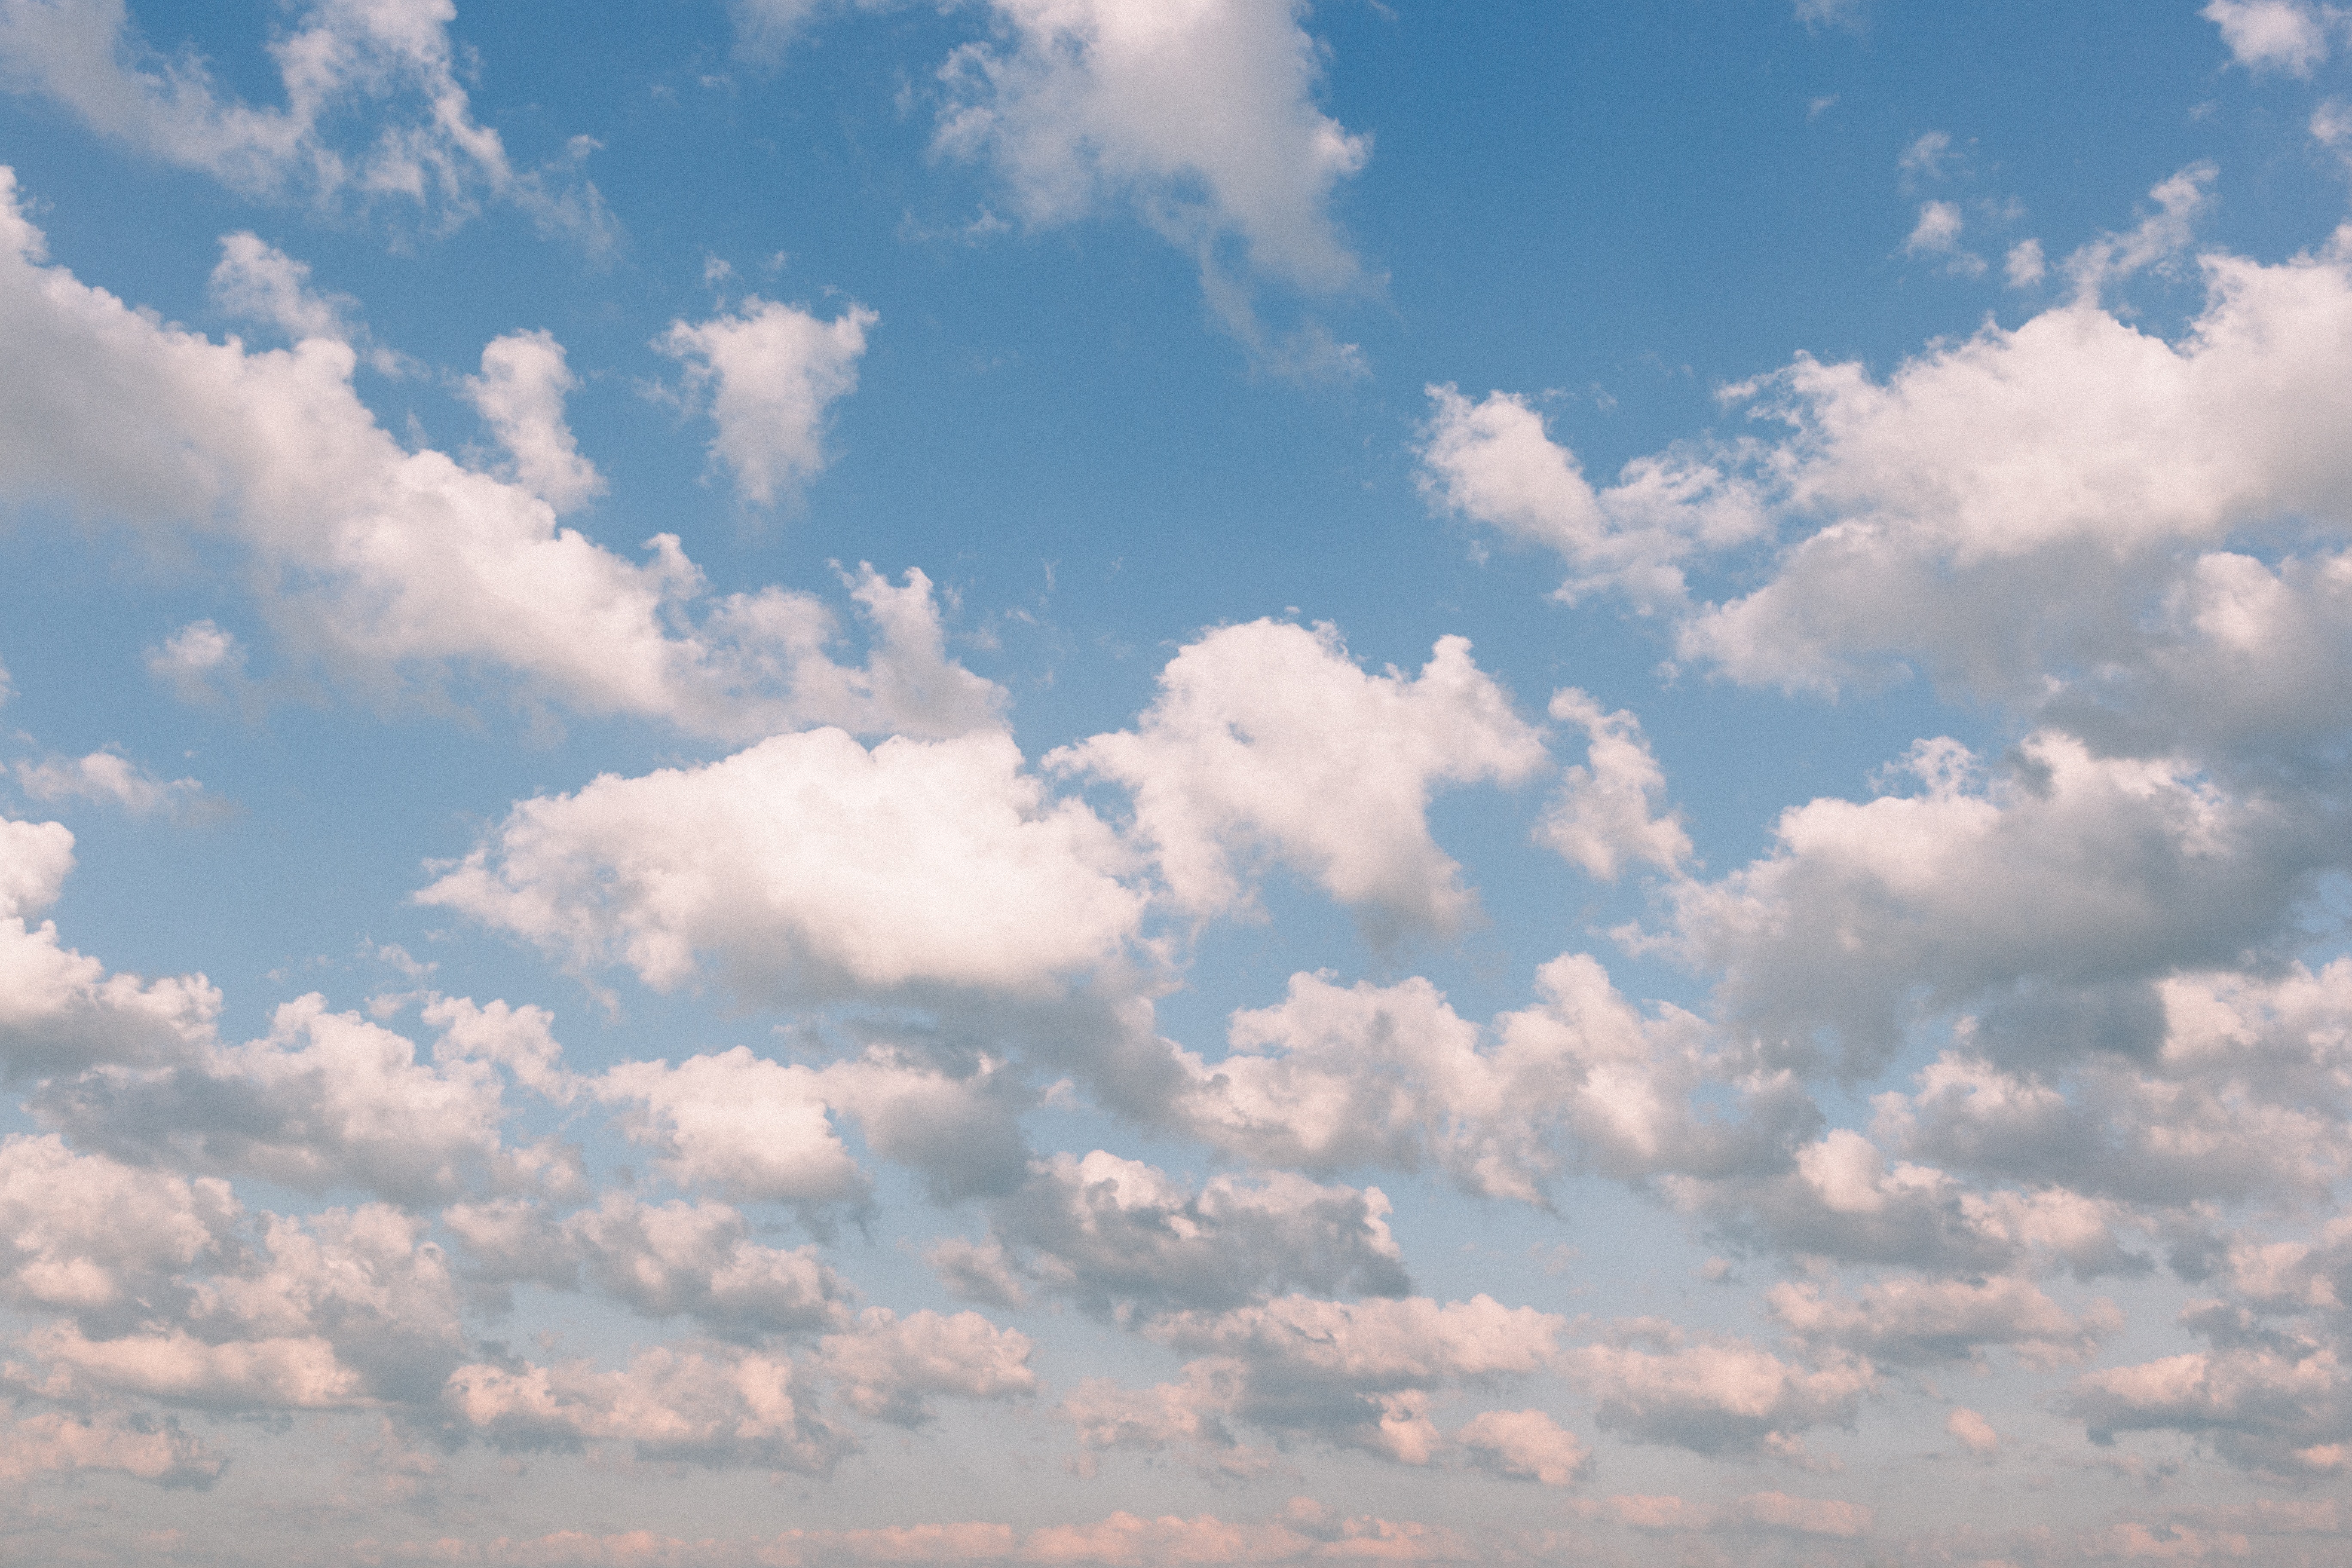
6. Place the clouds image by go to FILE >> Place Embedded and select the cloud image.
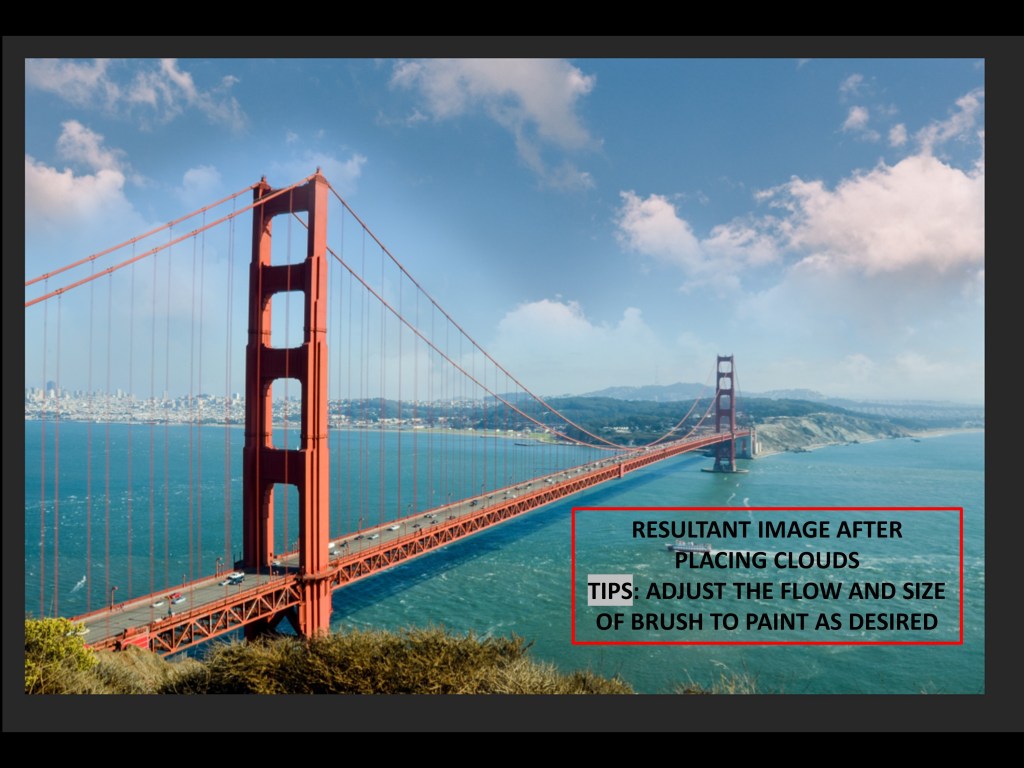
7. Now move the cloud image layer to below the bridge image layer as we did below.
The resultant image look of this compositon now…
PRO TIPS : Always play with the Flow percentage to describe your imagination.
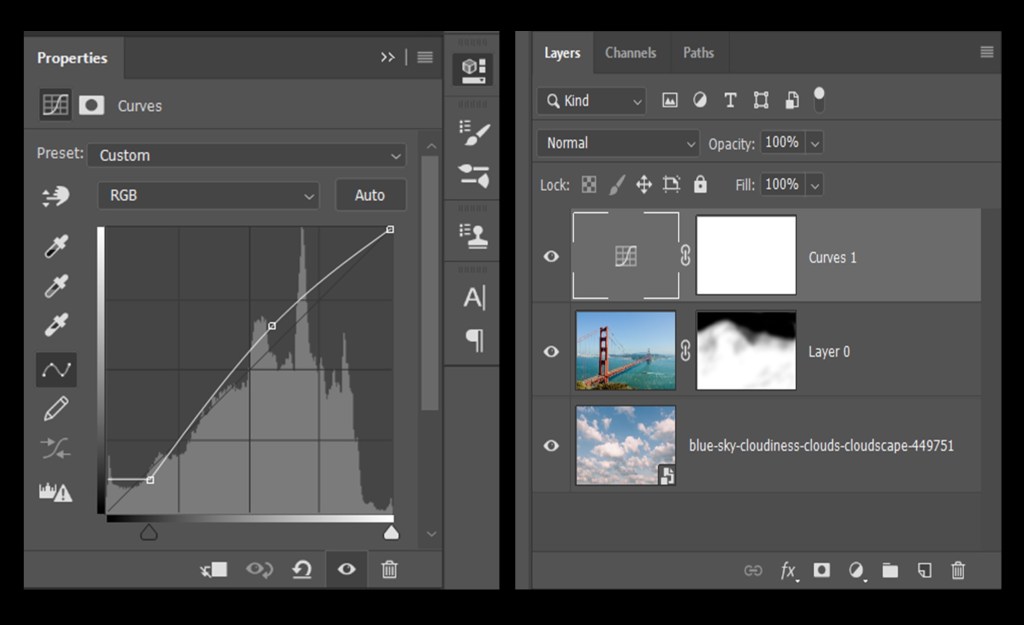
Go to Image in top menu bar and select ADJUSTMENTS > CURVE ADJUSTMENT .
Do as i did below or play with the curve as u wish from center to stretching it to upwards will increase exposure in it while pulling down will decrease it.
*SHORT VIDEO ON CURVE CONCEPT WILL BE RELEASED TOO SOON… SUBSCRIBE TO GET UPDATED WITH BLOG BELOW WITH EMAIL ID*
COMPOSITE PICTURE OBTAINED AFTER ADJUSTMENTS.
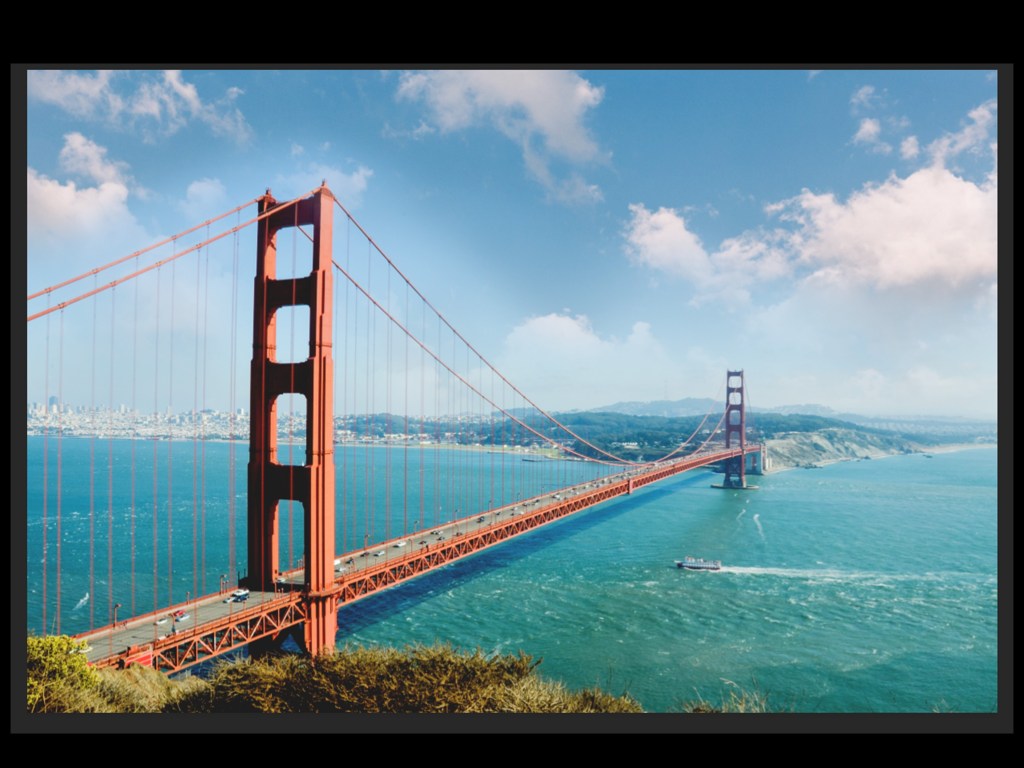
IMAGE FILES I USED YOU CAN DOWNLOAD IT BELOW :
DO SUBSCRIBE TO REMAIN UPDATED WITH LATEST POSTS.
