Layer Mask is a very important part of photoshop tools that gives us the ability to hide and unhide parts of the layer without deleting them.
This is very efficient and non-destructive way of working. And it helps designers to become more efficient and more creative.
To understand it well we will be constructing a composite image in this topic.
As in previous topic I already discussed about the creation of new layer and the way to mask a layer and reveal the important things we want only.
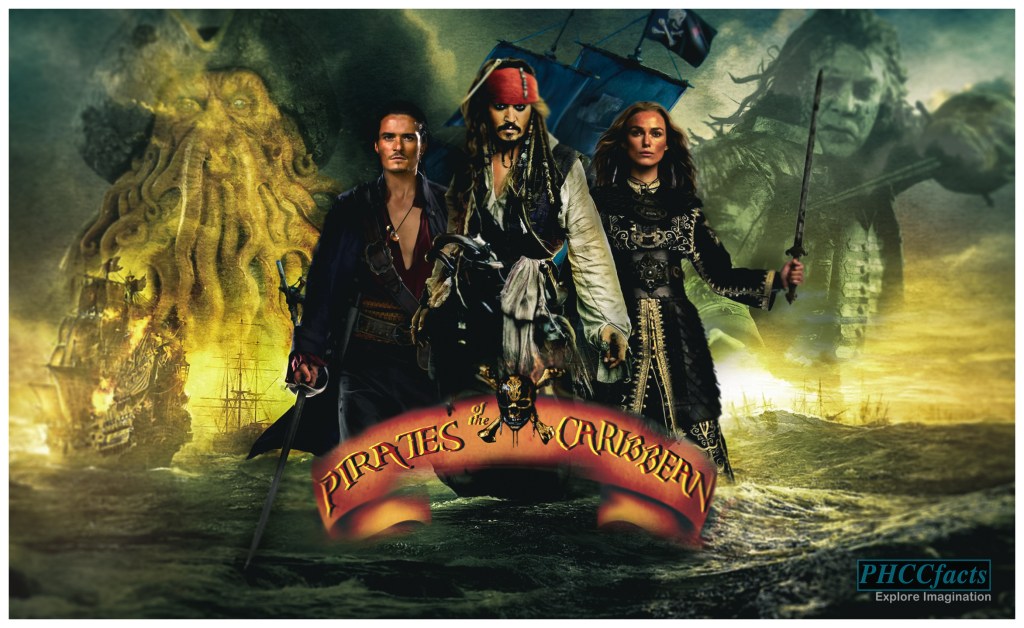
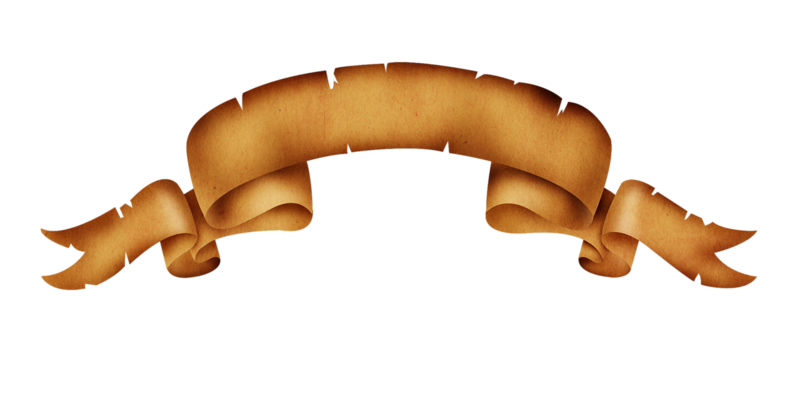
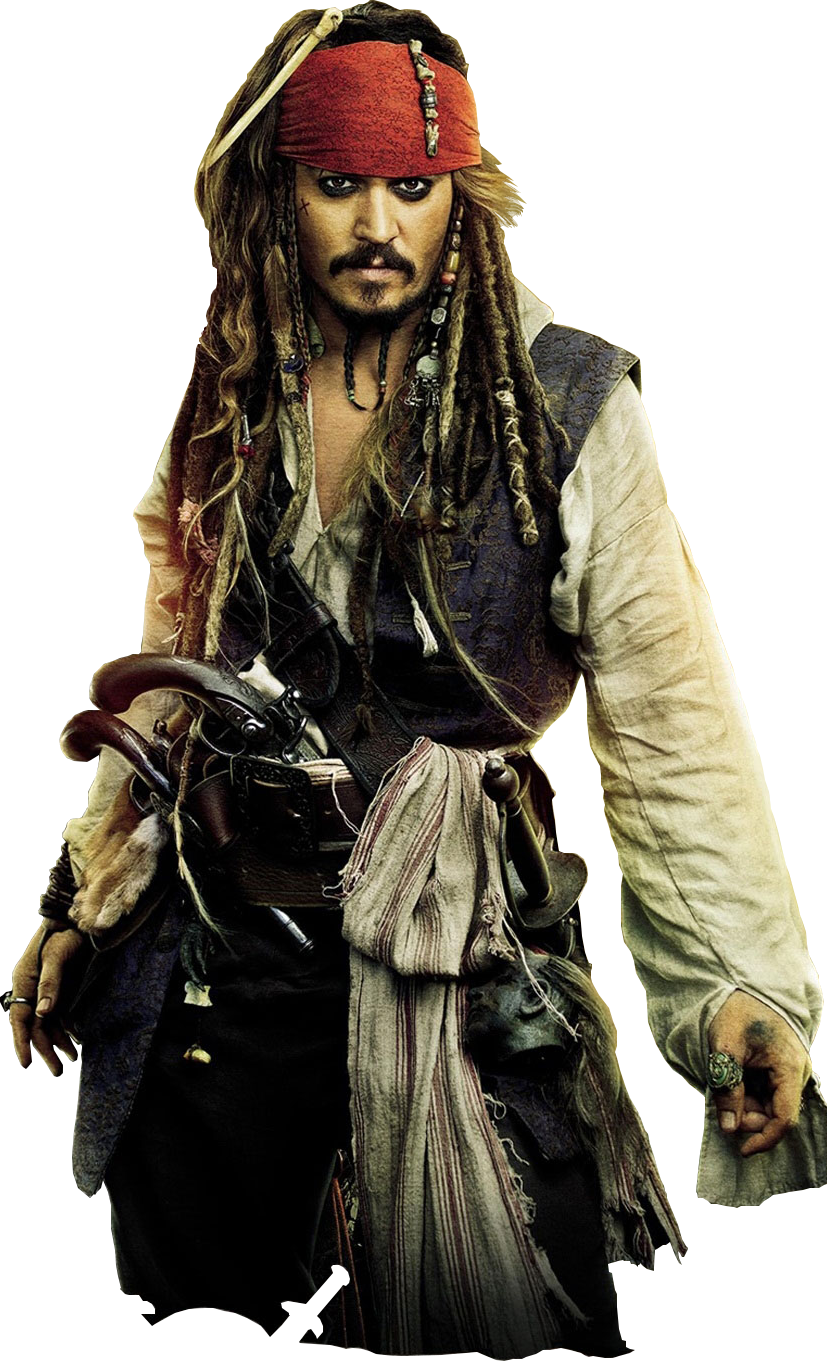
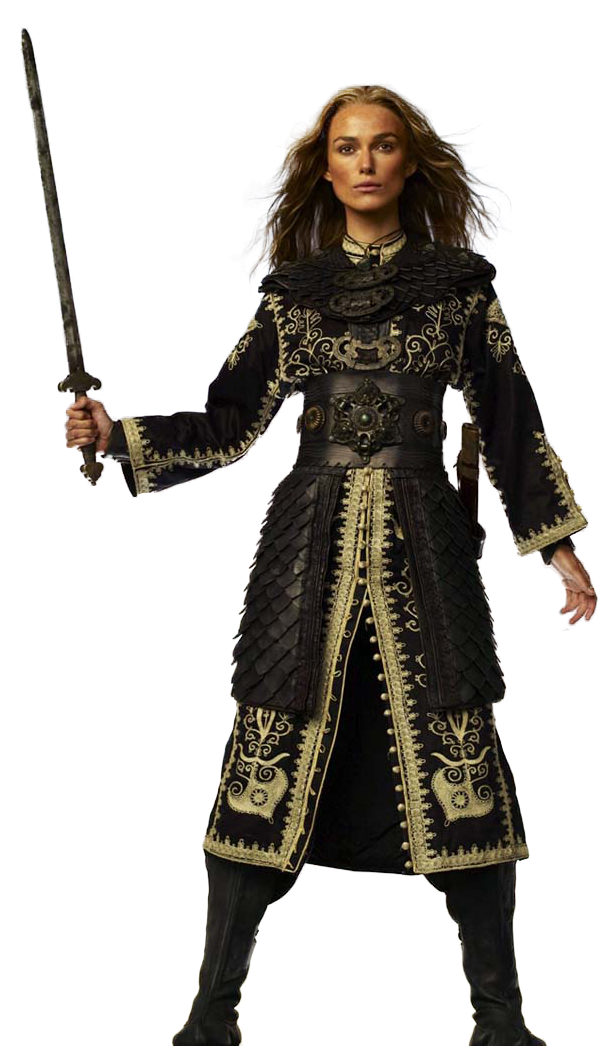
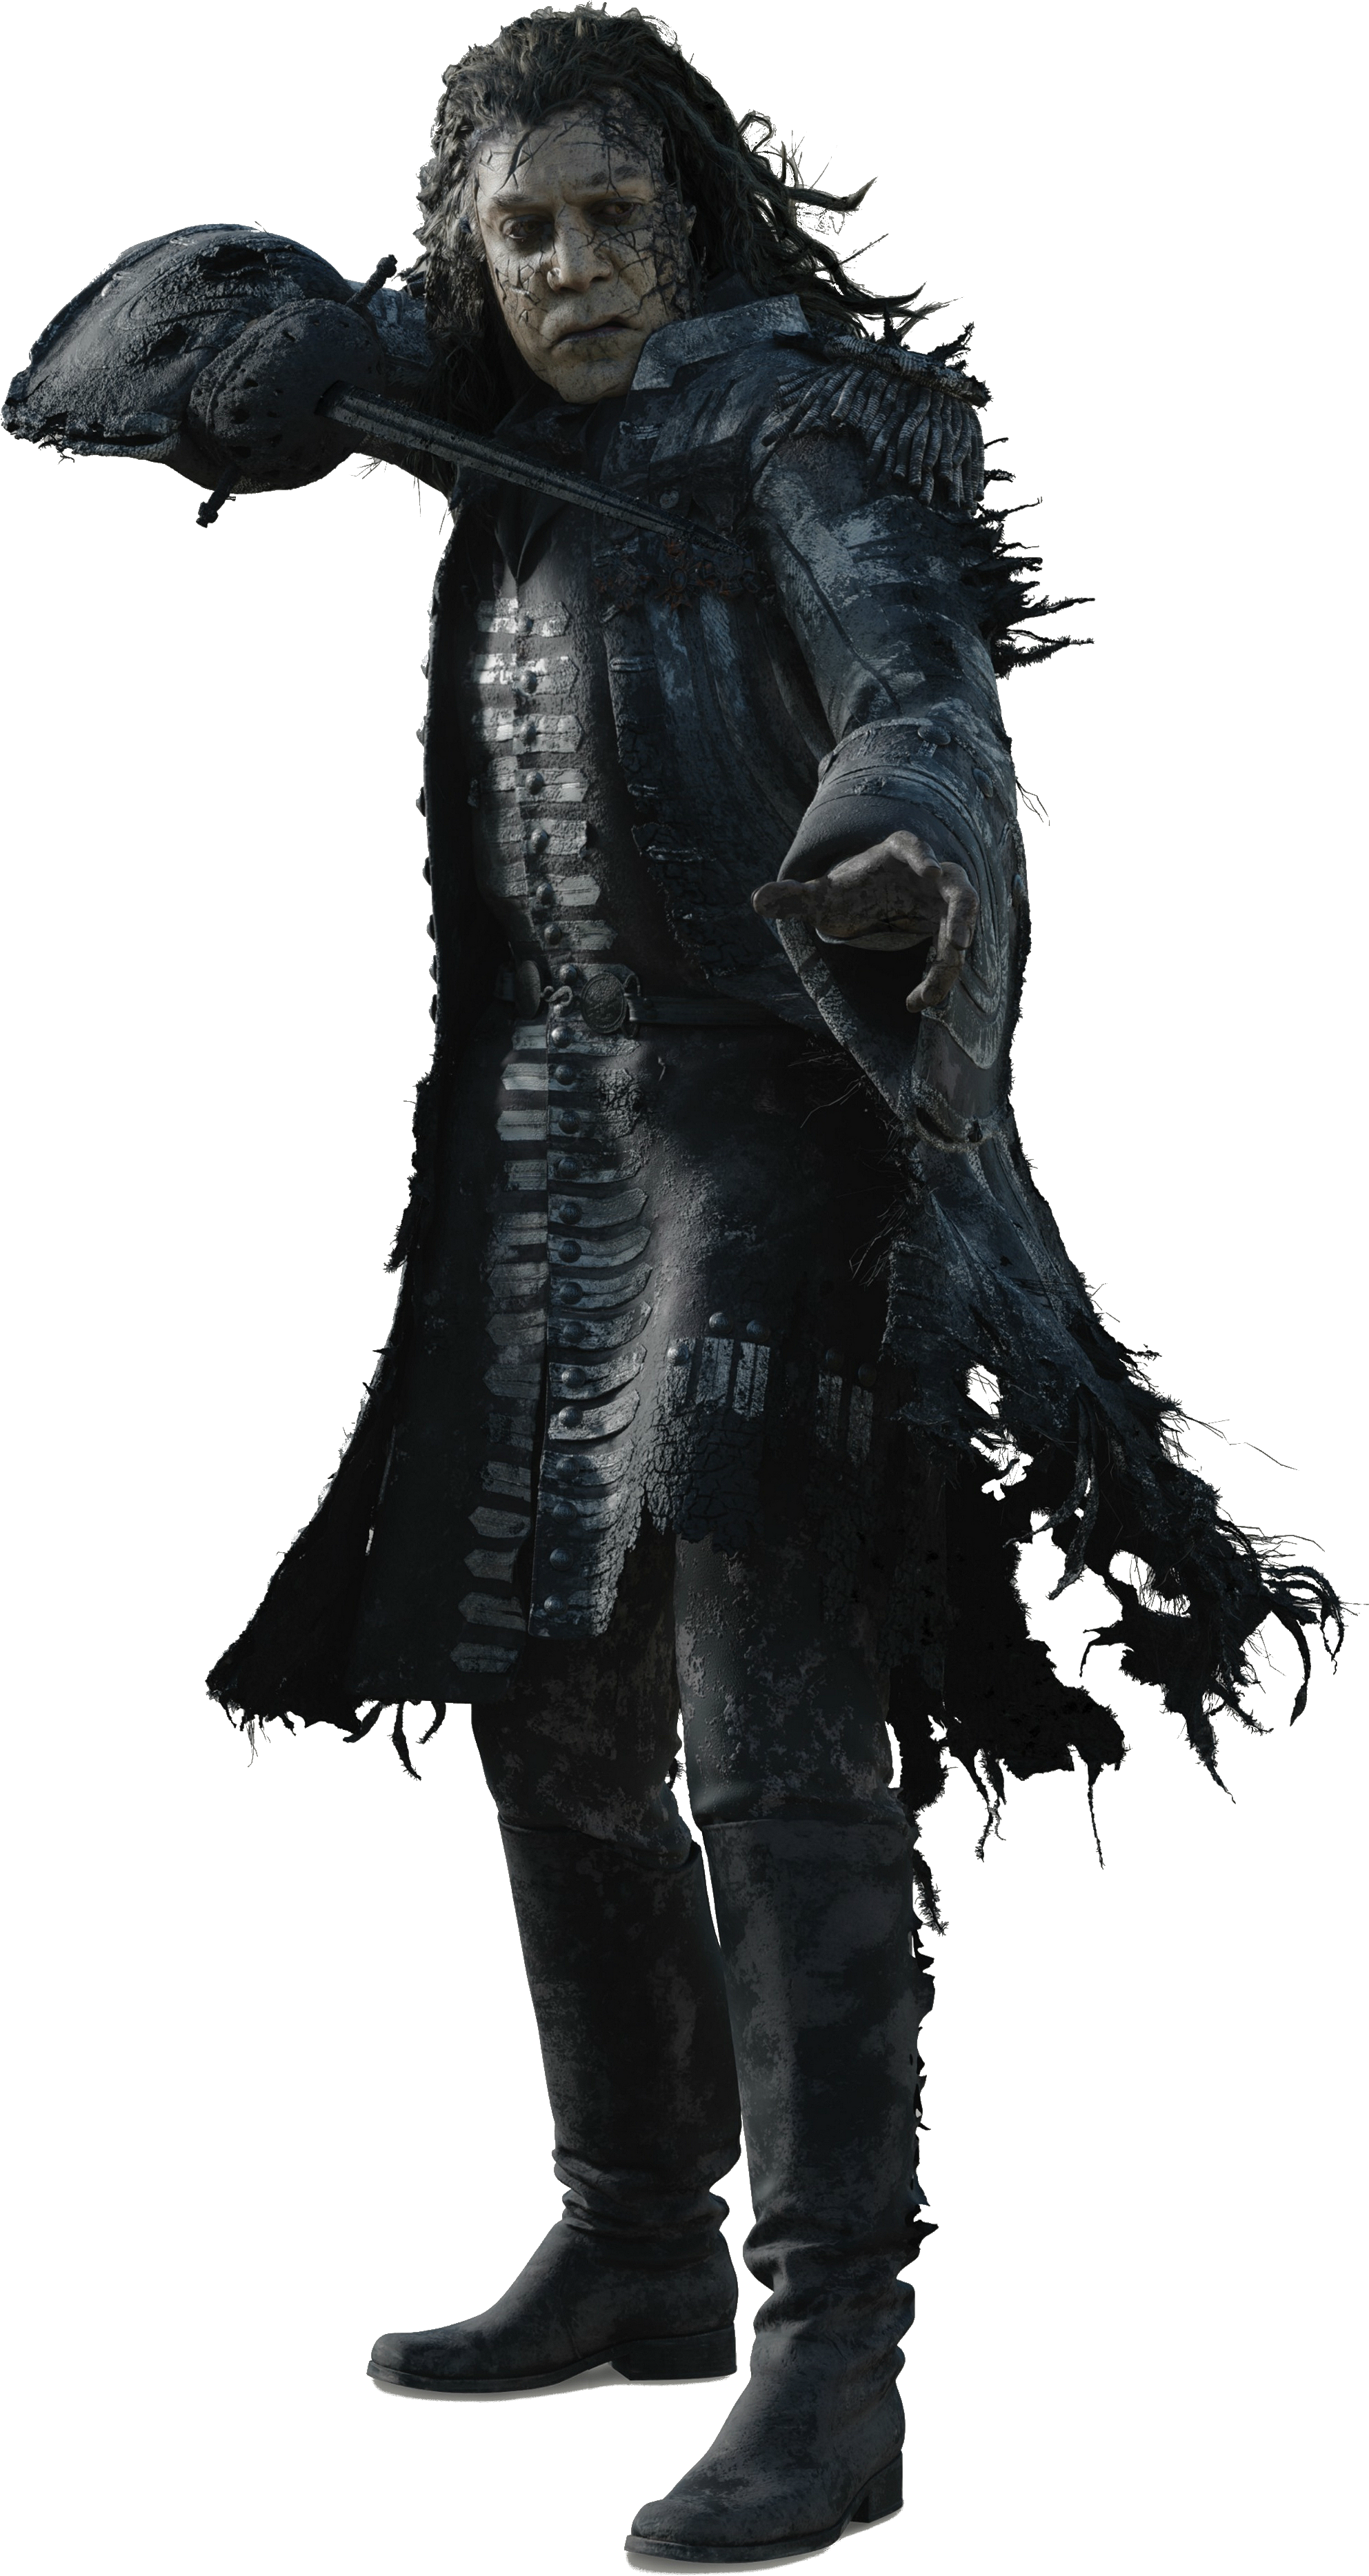
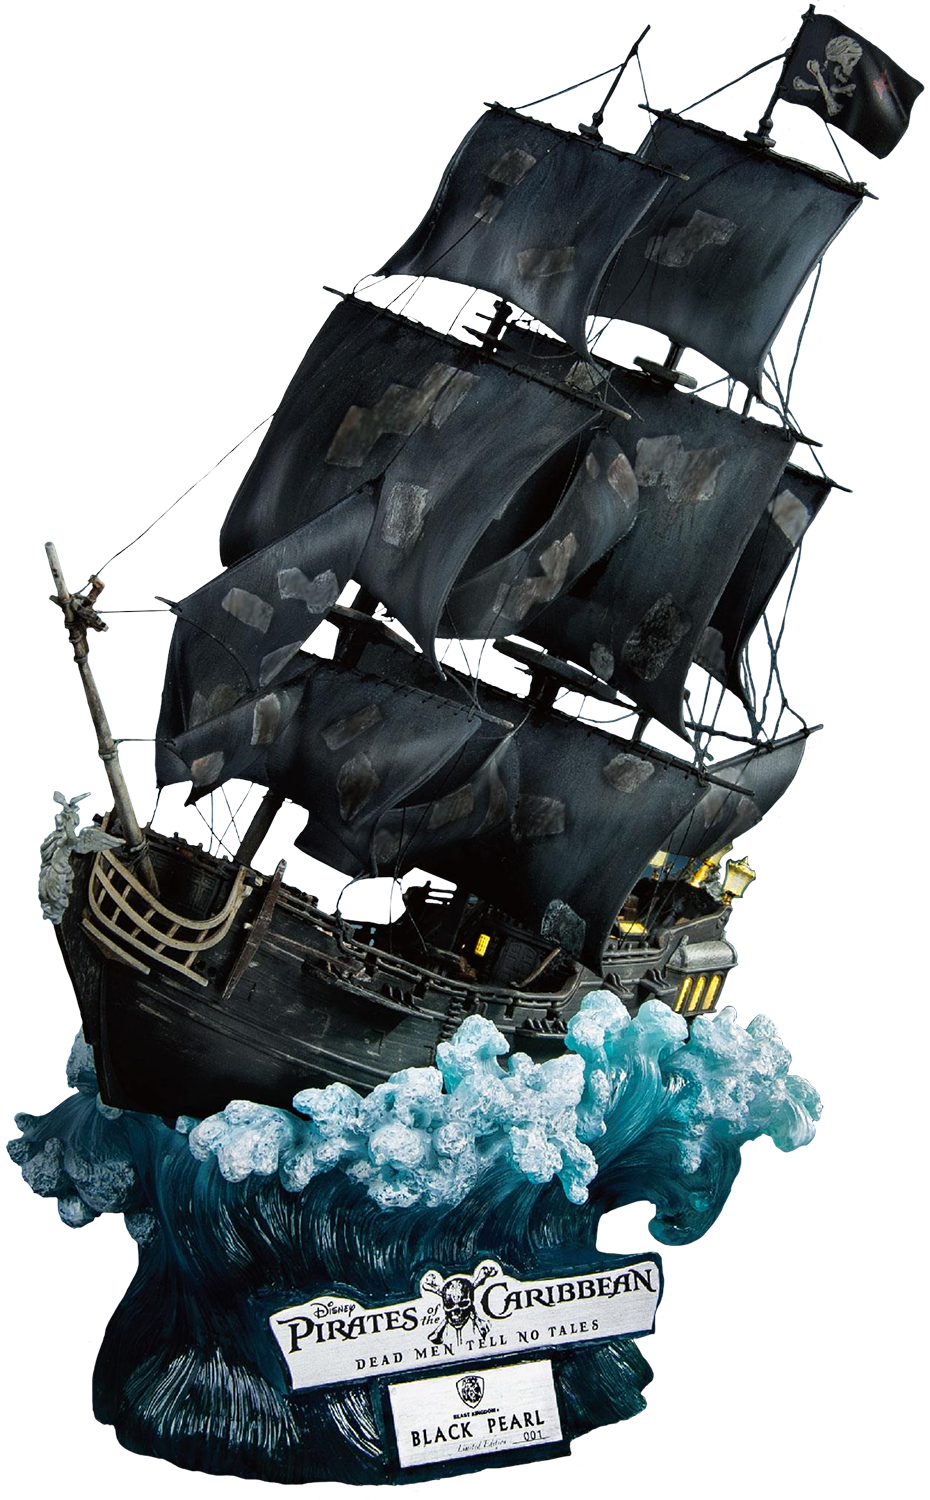
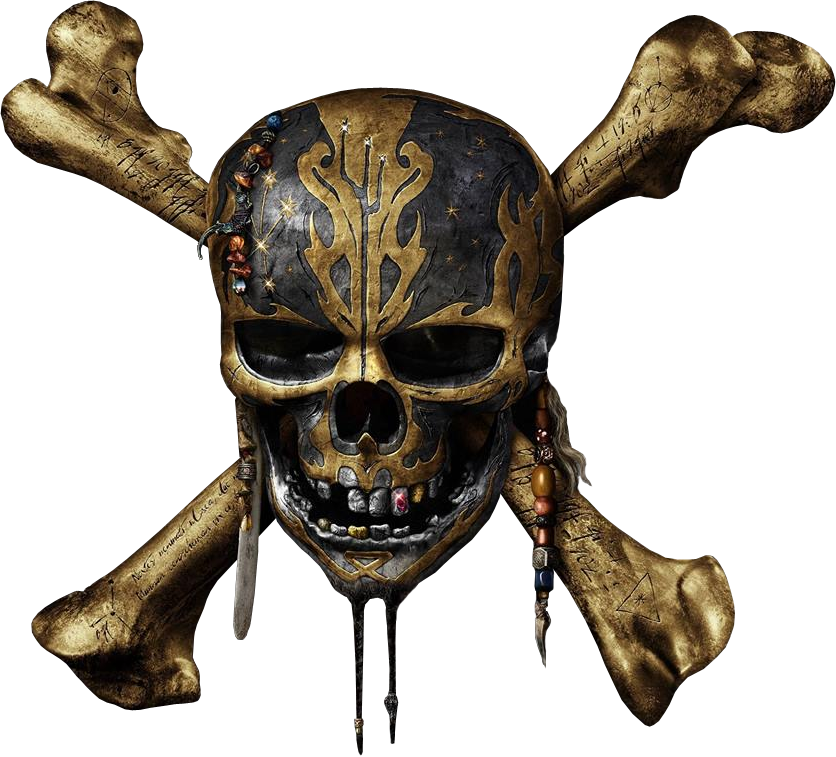
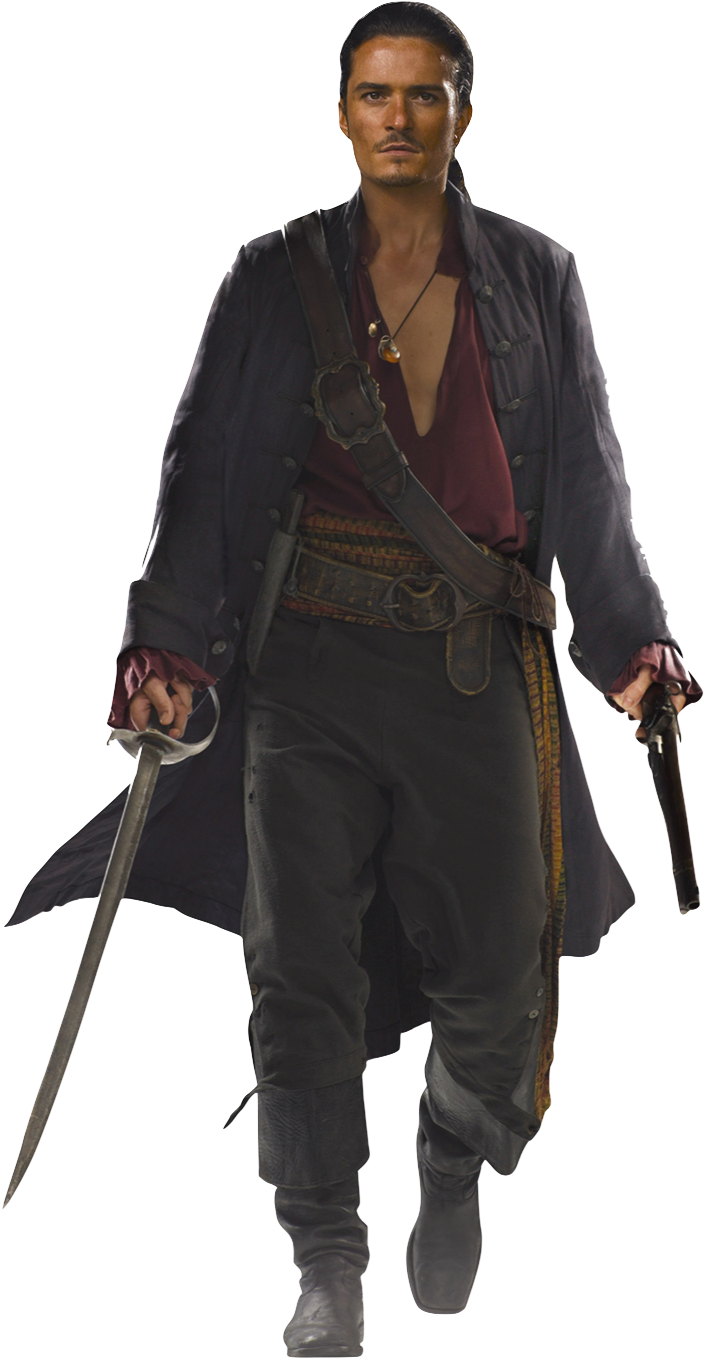
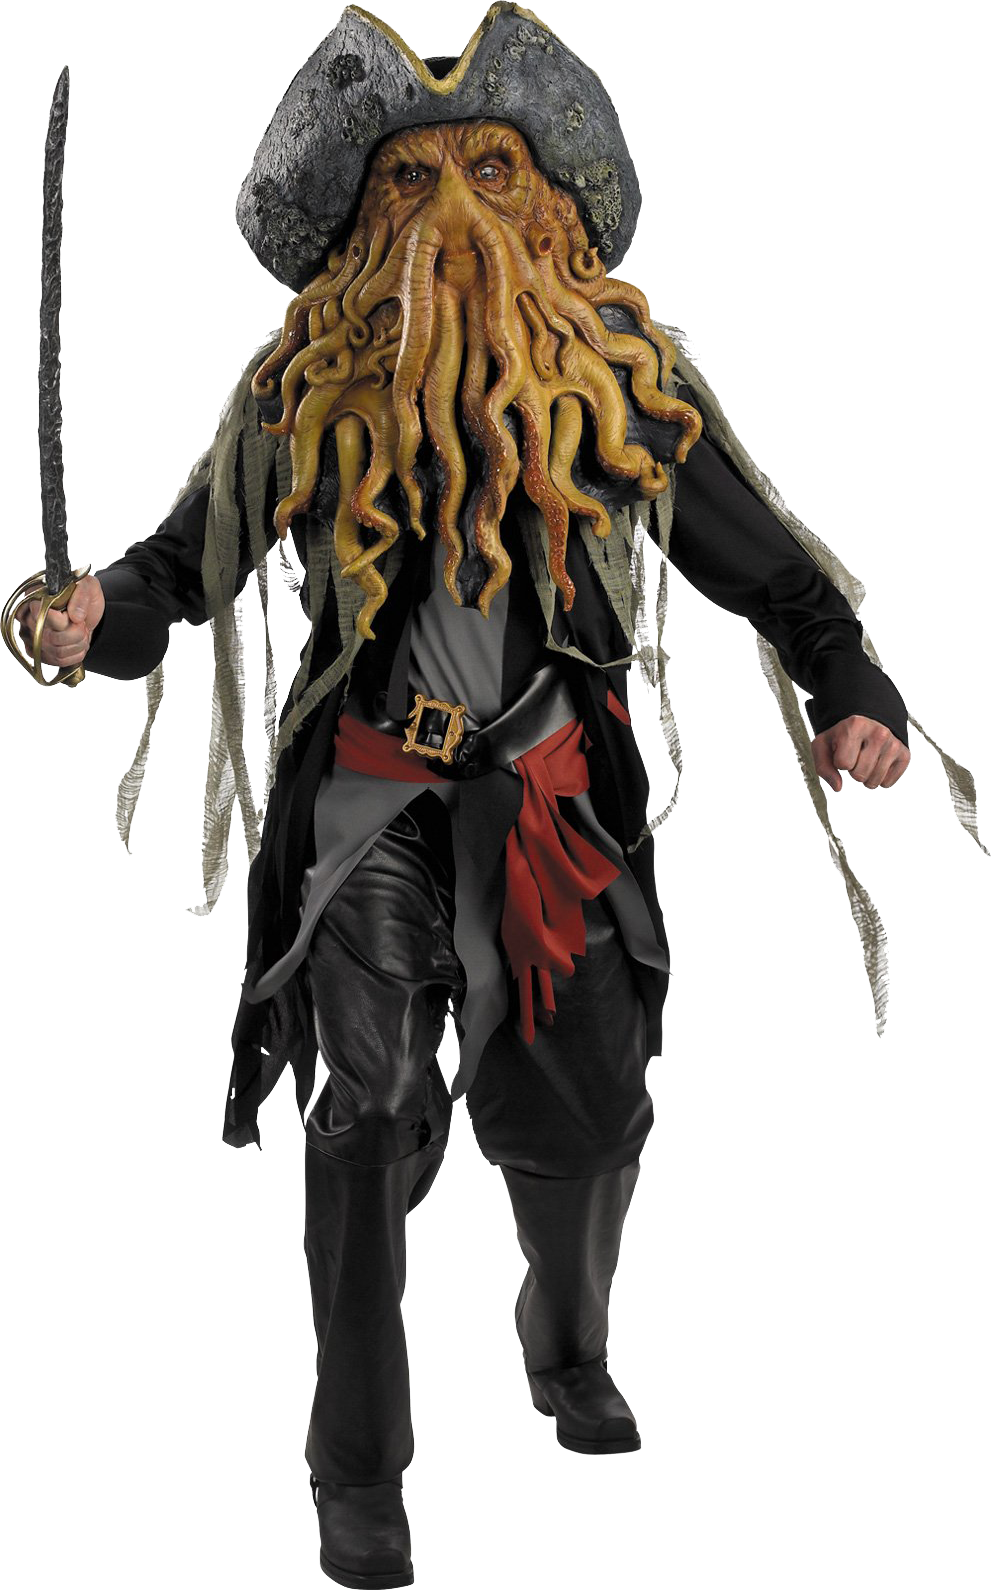
We will be doing masking with a example by creating a small movie poster of famous Hollywood movie “Pirates of the Caribbean“.
I will provide all the images we will use to make the composite picture. Also the .psd file of this example to have the effects and curves or level adjustments which you can copy it for now directly to apply the filters.
*Not to worry as we will discuss these adjustments tools in next blog Understanding Adjustments Tools with examples.*
DOWNLOAD BELOW IMAGES & PSD FILE TO FOLLOW :
PSD FILE POTC layer mask_tutorial DOWNLOAD
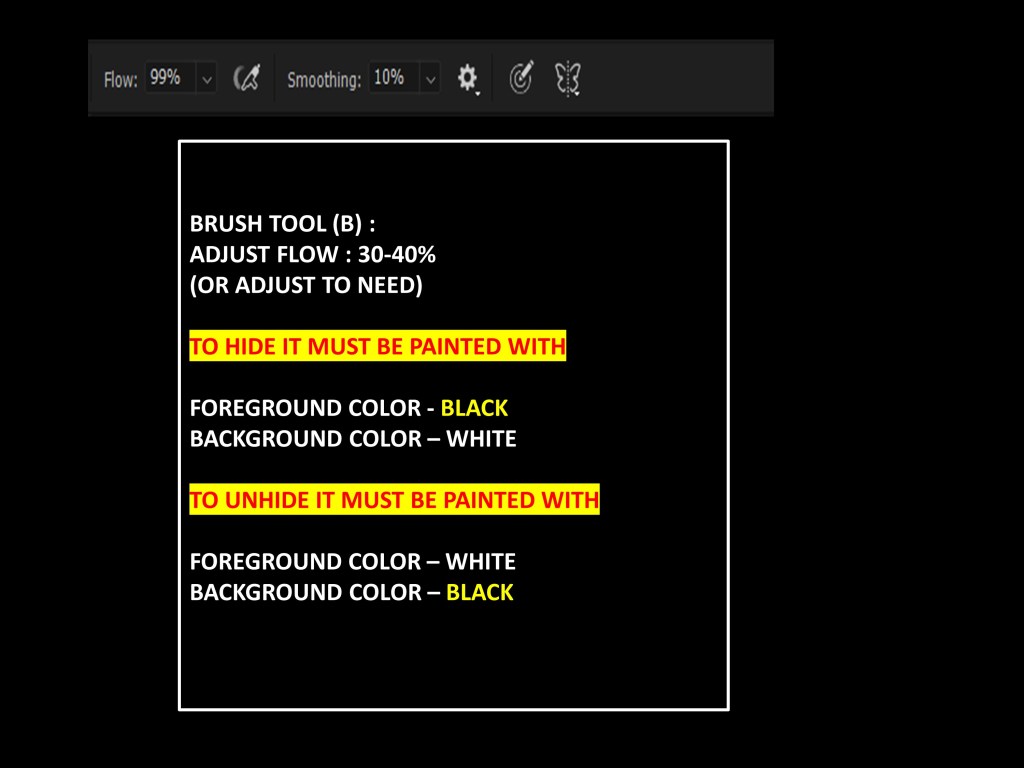
SET THE BRUSH FLOW AS BELOW :
STEPS :
- Open the Sea image as click on the LOCK ICON to unlock the layer.
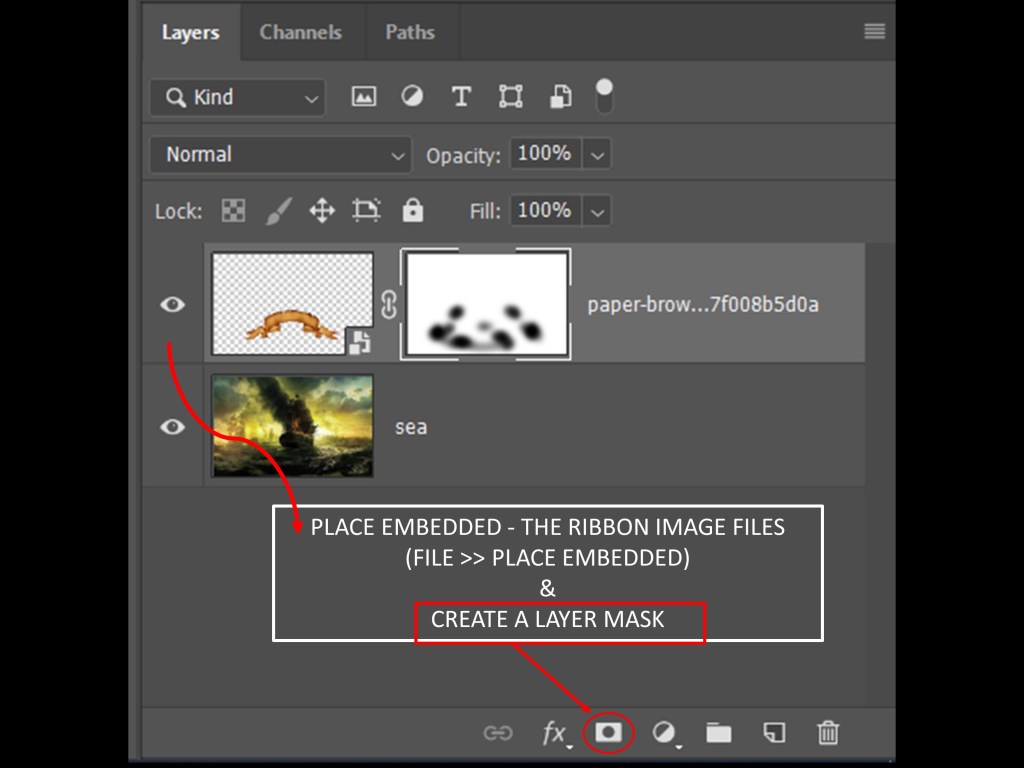
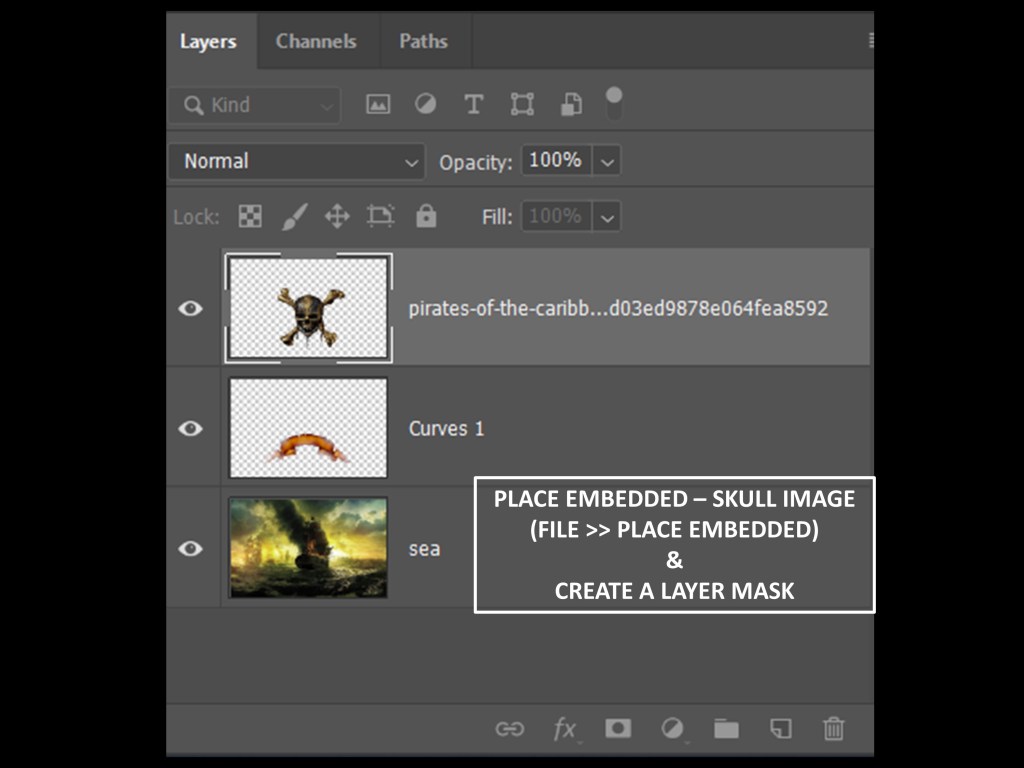
- Add the Ribbon image by Place Embedded going to file menu & create a layer mask and brush the portion you don’t want as keeping foreground color as BLACK or follow the image as provided above. (Our layer must look like this…)
3. Similarly add the skull image and position the skull on to the ribbon .
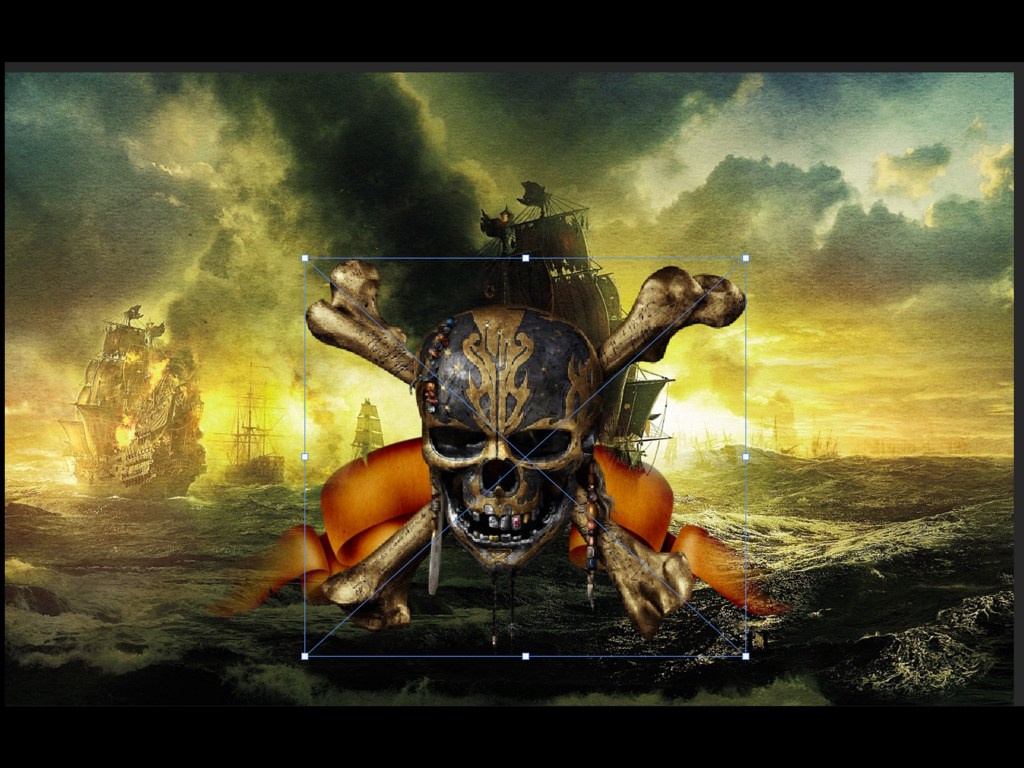
4. Resize the skull image by activating transform tool pressing key CTRL + T.
5. Adjust the curve adjustment layer to mix with background or simply copy the layers from the given .psd file above.
6. Add the text “Pirates of the Caribbean” by horizontal type tool(T) or simply copy the TEXT RIBBON AND SKULL group layer directly to your psd.
[ To get the font style I used contact me can’t upload due to security issue. ]
7. Similarly place all the characters according to the banner seen above or follow the .psd file.
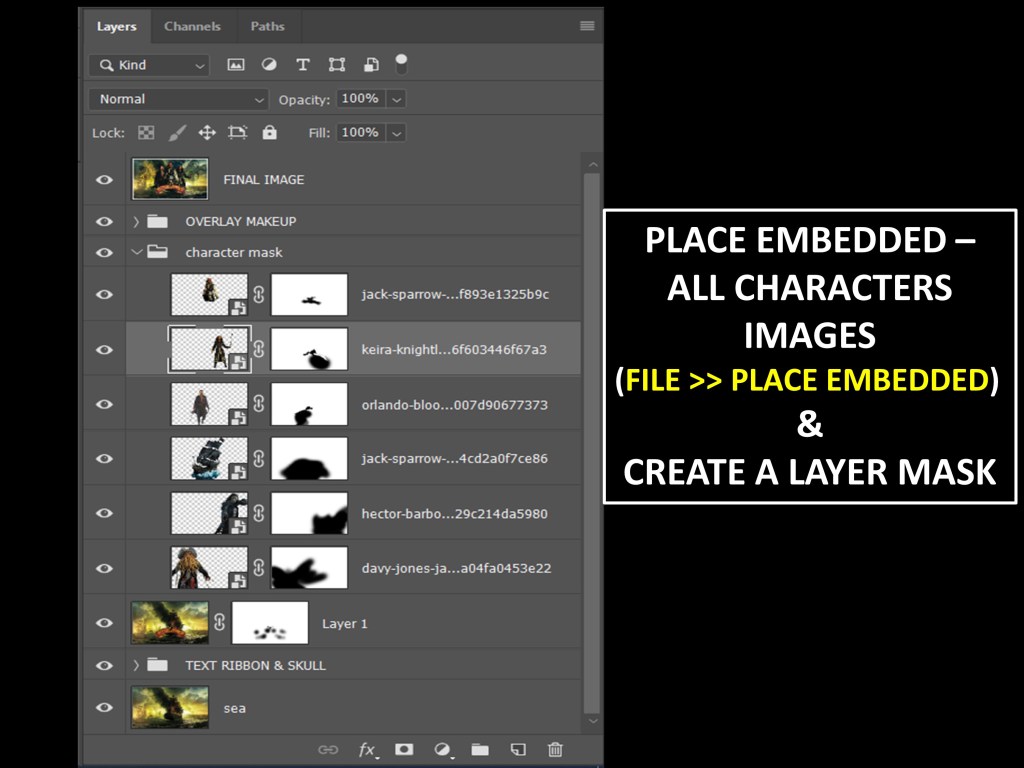
8. Create each layer its corresponding layer mask while adding the image .
9. Paint the unwanted part with black as foreground color serially while adding the images to hide the unwanted portions.( layer mask must be selected while painting)
10. Copy the layers adjustments tools settings directly into your psd file to apply the effects.
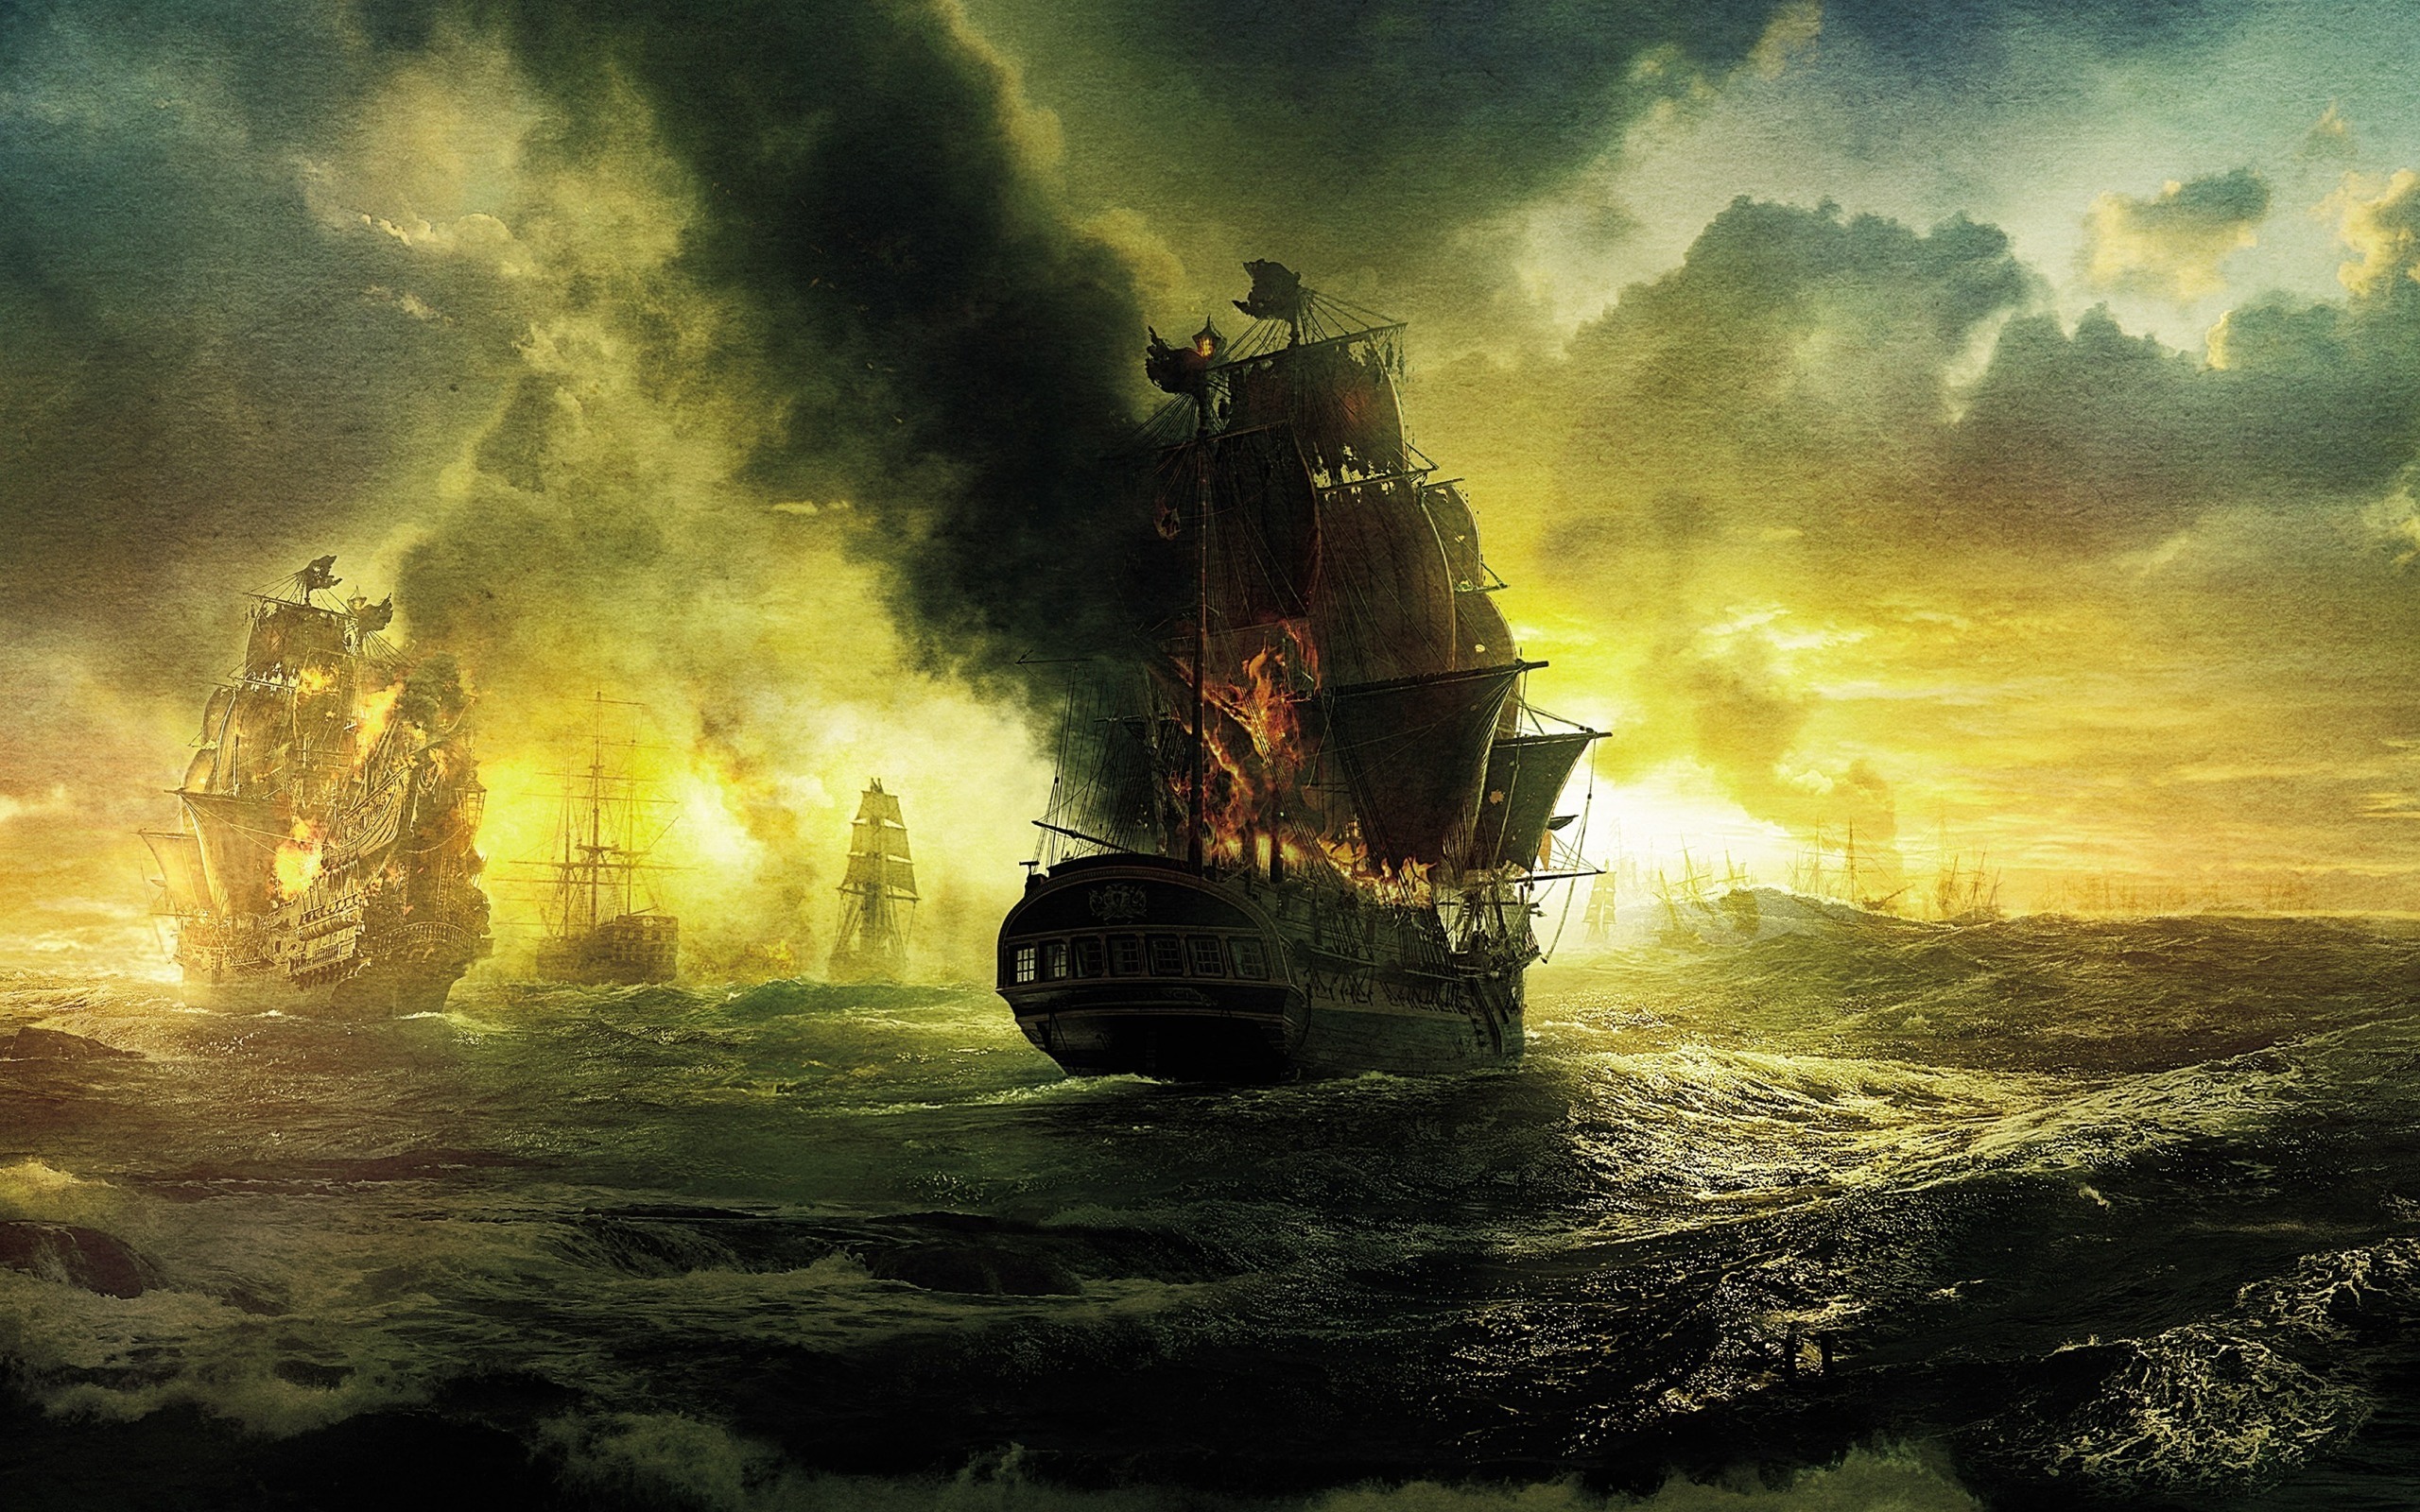
HERE IS THE COMPOSITE IMAGE BANNER WE CREATED

PRO TIPS :
- Change the blending modes to overlay or linear dodge to apply the shaded like filter effects to layers.
- Always zoom in the picture CTRL ++ to paint precisely.
- Keep the brush flow to 30-40% to have smooth brush and select rounded soft brush by right clicking in the document .
- Follow the .psd file provided and each time look for which type of blending modes are used.
It will be little tough in beginning but practice makes it perfect.
Any doubt or query Contact me .
Must go through previous blog ( Photoshop LAYERS ) before proceeding in layer mask edit.
JIO ର ଏହି ଦୁଇଟି ରିଚାର୍ଜ ପ୍ଲାନରେ ମାଗଣାରେ ଦେଖି ହେବ IPL 2020 ଲାଇଭ୍ ଷ୍ଟ୍ରିମିଂ !
ଓଡିଆ ଭାଷା ଅନୁବାଦ ବର୍ତ୍ତମାନ ମାଇକ୍ରୋସଫ୍ଟ ଟ୍ରାନ୍ସଲେଟର ଉପଲବ୍ଧ

It is really helpful when u give the step by step , detailing efforts… In addition to that i like the pro tips sir.
LikeLiked by 1 person